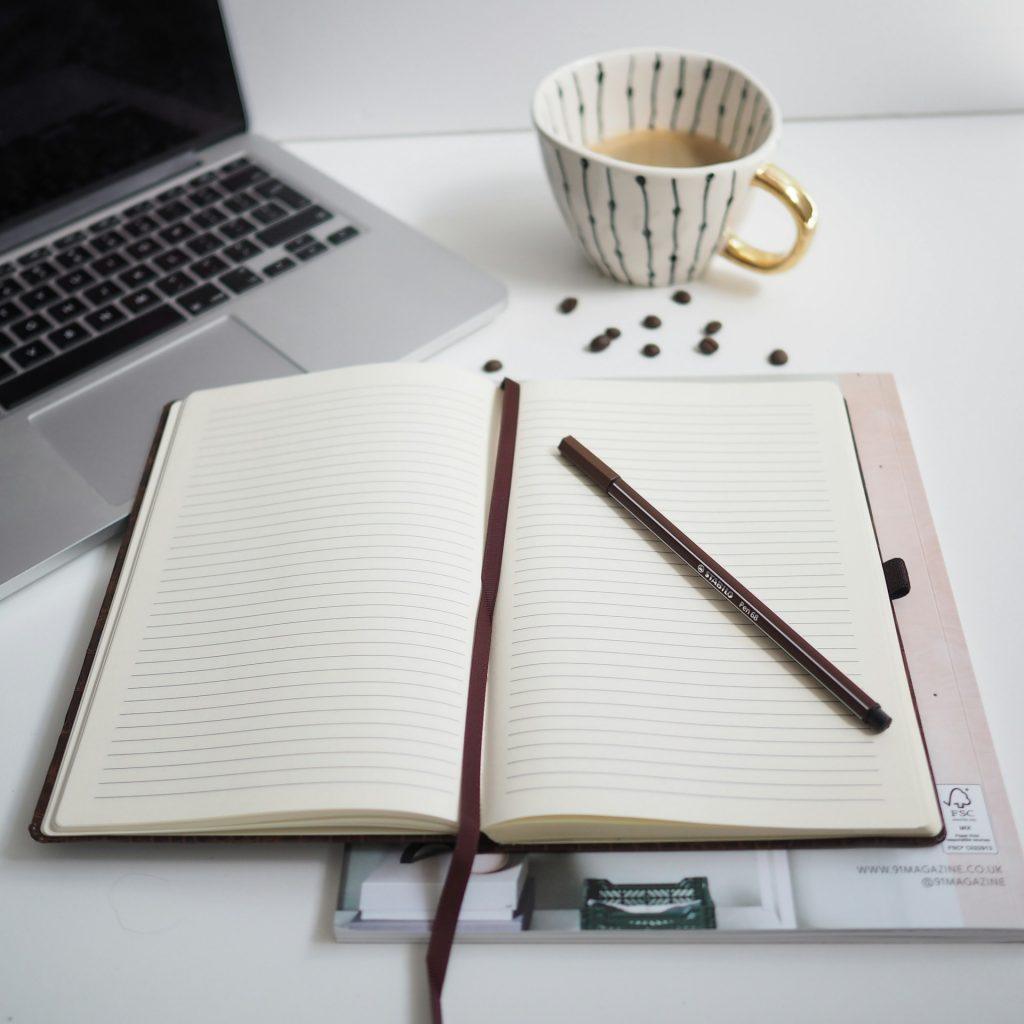
Daily Goal | One Hour Cleaning Desk Space | Health Storey Goal |

What are we writing about today? Building a calm, productive home office with smart layout, clever storage, and simple maintenance habits that keep clutter at bay—without sacrificing style or comfort.

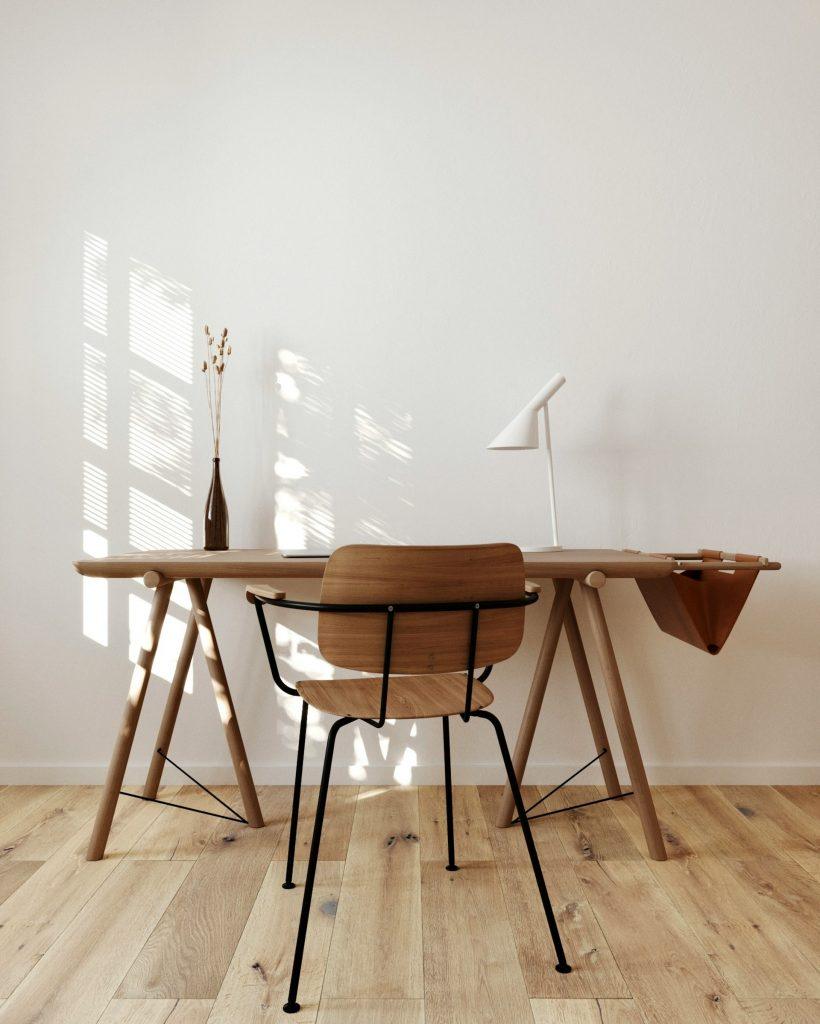
Monday : Daily Health Storey Goal | Clear off your desktop for one hour.


Working from home can blur the line between living space and workspace, which often leads to clutter creep. The goal isn’t a sterile office; it’s a space that feels calm, functions efficiently, and still reflects your personality. Below is a practical guide to designing a home office that stays neat through smart layout, thoughtful storage, and easy maintenance routines.

[pms-restrict]

Start with your needs and the space you have

  • Define purpose: writing, video calls, design work, or a combo. Your workflow dictates furniture and storage choices.
  • Measure and plan: note doorways, window light, and power outlets. Sketch a simple layout with a desk, chair, and at least one storage solution.
  • Consider traffic flow: leave at least 3 feet of clear space for movement and easy access to frequently used items.

Pick a layout that minimizes clutter

  • Desk against a wall with clearance behind you for movement and cable routing.
  • Corner or L-shaped setups for compact rooms that still offer generous work surface.
  • Wall-mounted options: fold-down desks or wall shelves to maximize floor space in small rooms.

Create clear work zones

  • Work zone: primary desk surface for computer, keyboard, and task tools.
  • Storage zone: filing cabinets, shelves, and labeled containers within arm’s reach.
  • Focus/meeting zone: a small area free of nonessential items for calls or quick brainstorms.
  • Personal zone: one or two items that bring you joy but don’t overwhelm the space.

Desk and surface essentials for a tidy vibe

  • Choose a clean, unobtrusive desk: simple lines, a finish that hides fingerprints, and enough depth for monitors.
  • Minimalist monitor setup: one or two screens, neatly mounted if possible, to reduce desk clutter.
  • Surface discipline: limit to essentials only—monitor, keyboard, a notebook or planner, and one decorative but compact item.

Smart storage that actually gets used

  • Vertical solutions: tall bookcases, wall-mounted shelves, or pegboards to keep items off the desk.
  • Hidden storage: under-desk drawers, rolling carts, or slim filing cabinets for papers.
  • Clear labeling: use consistent labels for folders, boxes, and bins to speed up tidying.
  • Drawer strategy: implement multi-compartment organizers for pens, cables, and supplies.

Cable management that makes a difference

  • Centralize power: use a single power strip with a tidy cord sleeve.
  • Route cords out of sight: clips, channels, and adhesive cable organizers along the desk edge or behind the desk.
  • Wireless first: where possible, choose wireless peripherals and cloud-based workflows to reduce cables.
  • Hide the chaos: a shallow cable box or basket keeps cords contained and out of view.

Personalization, but keep it calm

  • One or two meaningful items: a small photo frame, a single plant, or a favorite trophy—kept tidy and minimal.
  • Plant life: choose a low-maintenance plant to add life without creating mess or extra care.
  • Color restraint: a cohesive palette (2–3 colors) for accessories helps the space feel intentional and serene.

Lighting and ergonomics for long work sessions

  • Natural light first: place the desk near a window if possible, but avoid screen glare.
  • Task lighting: a good desk lamp with adjustable brightness reduces eye strain.
  • Ergonomics: monitor at eye level, chair supports your lower back, and keyboard/mouse within easy reach to prevent clutter and fatigue.

Maintenance routines that keep neatness effortless

  • Daily 5-minute reset: close the laptop, return items to their designated spots, and straighten the desk.
  • Weekly tidy: purge old papers, dust surfaces, and wipe down electronics.
  • Monthly deep clean: clean monitor screens, keyboards, and refresh storage zones if you notice drift or dust buildup.
  • Quick digital tidy: routinely organize files in the cloud or on your computer to prevent “digital clutter” that mirrors physical clutter.

Small-space hacks that really work

  • Foldable or wall-mounted desk options for ultra-tight rooms.
  • Stackable storage or modular units that can be reconfigured as needs change.
  • Floating felt or cork boards for notes and inspiration without taking up desk real estate.
  • Use color-weighted cues: match the color of storage bins to the wall to create a seamless, less cluttered look.

A simple, repeatable routine you can actually keep

  • The 10-minute Friday reset: clear the week’s leftovers, archive completed tasks, and prep the space for Monday.
  • The “one-touch” rule for paperwork: deal with a document the first time you touch it (file, action, or discard).
  • The weekly inventory check: ensure you aren’t accumulating unused gadgets or supplies.

If you share the space or have a multi-use room

  • Separate visually: use a small area rug, curtain, or room divider to define the office area.
  • But keep it practical: ensure you still have easy access to shared items and maintain a tidy, respectful zone for others.

The Desk Plan

  • Clear, measure, and draft a simple layout.
  • Choose storage solutions and implement a clean desk policy.
  • Route cables and install a discreet cable management system.
  • Add one plant and a small personal item.
  • Set up a daily 5-minute reset routine.
  • Create a weekly 15-minute tidy ritual.
  • Review usability and adjust zones or storage as needed.

Before and after: visualizing the transformation

  • Before: a crowded desk with loose papers, tangled cables, and a hodgepodge of items.
  • After: a calm, organized space with a clean desk surface, clearly labeled storage, and a couple of personal touches that don’t overwhelm.

Practical tips to maximize impact

  • Stick to a consistent color palette for accessories to create a cohesive look.
  • Invest in one high-quality, functional item (chair, desk mat, or storage unit) to reduce clutter and improve usability.
  • Let the space reflect your workflow—don’t display items you don’t use regularly.
  • Keep an inbox tray or digital inbox for incoming items
[/pms-restrict]

First Aid | Are You Ready For Minor Emergencies?

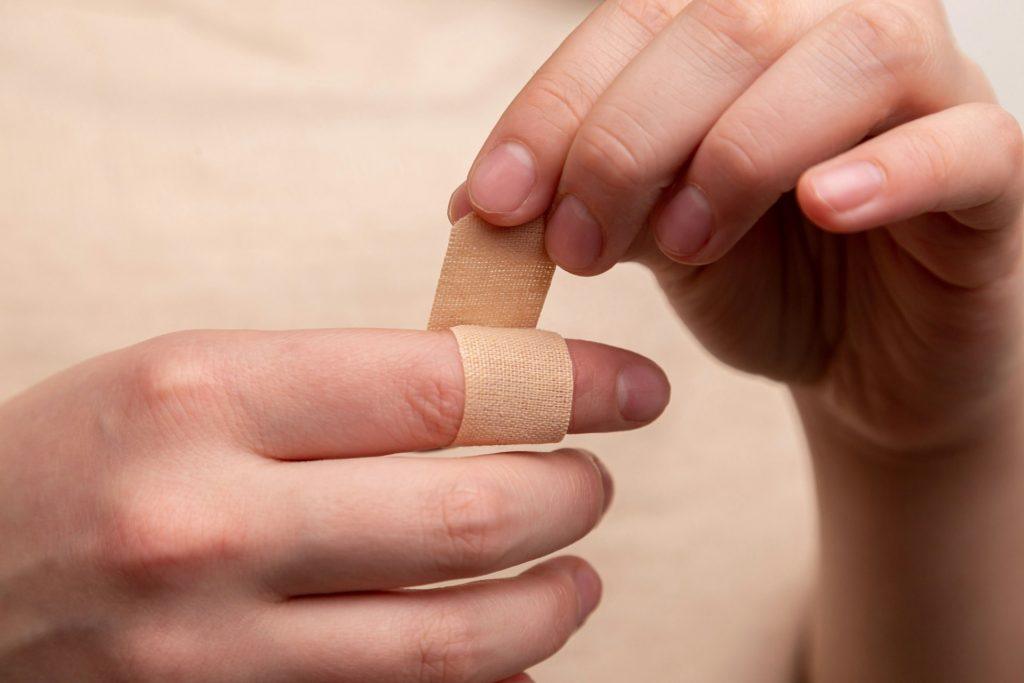
Title: The Essential Home First Aid Kit: What to Include, How to Store It, and Basic First Aid for Common Home Injuries


Being prepared with a well-stocked first aid kit can make a real difference when accidents happen. A good kit isn’t just about having bandages; it’s about having the right supplies organized so you can act quickly and calmly. This guide gives you a practical shopping list, storage tips, and simple first aid steps for the most common home injuries. If someone is severely injured (heavy bleeding, trouble breathing, chest pain, fainting, head injury with confusion, etc.), call emergency services right away.

What to include in a home first aid kit


Think in categories: supplies for cleaning and protecting wounds, bandages, tools, medications, comfort items, and documentation. Adapt quantities to the size of your household.

Basic home kit

  • First aid manual or quick-reference card (the quick steps you can follow)
  • Sterile gauze pads (4×4 inches and 2×2 inches; several each)
  • Adhesive bandages in multiple sizes (a few large, several small, plus some waterproof)
  • Adhesive tape (medical tape, 1 inch wide)
  • Antibiotic ointment (topical antibiotic) and antiseptic wipes or solution
  • Hydrocortisone cream (1%) for itching and rashes
  • Burn gel or nonstick dressing for minor burns
  • Disposable sterile gloves (nitrile or latex) in at least 2 pairs
  • Scissors (sturdy, blunt-tip) and tweezers
  • Elastic or cohesive bandages (for sprains)
  • Instant cold packs (2–4)
  • Warmth/heat pack (optional for comfort; not a substitute for medical care)
  • Pain relievers/fever reducers (check age suitability): acetaminophen and/or ibuprofen (for adults; pediatric versions if you have children)
  • Oral rehydration salts or a sports drink powder (for dehydration)
  • Saline nasal spray or contact lens solution and/or sterile saline for eye irrigation
  • Thermometer (digital, preferably with a fever range)
  • Washable red safety pin or “triage” pin for securing bandages
  • Emergency contact card with family doctor, local urgent care, poison control, and emergency numbers
  • A small flashlight and extra batteries (good for nighttime needs)
  • A simple, waterproof container or pouch to keep items dry and organized
  • A list of allergies and medications for all household members (keep it updated)

Optional upgrades

  • Additional specialty items: butterfly closures (steri-strips) for small lacerations, a suture removal kit (for trained users—not a substitute for professional care), a CPR face shield or barrier device, a blood glucose meter (if someone in the home has diabetes), and an allergy/epinephrine plan if someone has a known severe allergy (and must-have auto-injector if prescribed)
  • Extra supplies for kids: kid-friendly bandages and gentle skin cleansers
  • A small notebook or wipe-clean sheet to log injuries and actions taken

How to store and organize the kit

  • Pick a single, accessible location: a kitchen cabinet, pantry shelf, or a dedicated closet where clutter is minimal and the kit isn’t exposed to heat or moisture.
  • Choose the right container: a hard-shell tackle box, a small plastic toolkit, or a labeled first-aid chest with clear compartments. The goal is visibility and quick access.
  • Separate zones or containers within the kit:
  • Wounds: gauze, bandages, antiseptics, antibiotic ointment, nonstick dressings
  • Tools: scissors, tweezers, safety pins, tape
  • Medications and burn/relief items: pain relievers, hydrocortisone cream, burn gel
  • Comfort and protection: gloves, instant cold packs, spare blankets or a small nasal saline
  • Documentation and extras: emergency numbers, allergy list, thermometer
  • Label clearly and keep items in their original packaging as much as possible (e.g., medicine bottles with dosage instructions).
  • Check expiration dates regularly (every 3–6 months is a good rule). Replace any expired items and rotate supplies so older items are used first.
  • Keep a simple inventory list on the inside of the kit lid or a small card in the box. Update whenever you add or remove items.
  • Child safety: if you have young children, store the kit in a high, locked cabinet or use a childproof container and teach older kids basic safety about not touching medicines.
  • Car and travel kits: it’s handy to have a smaller, separate kit for cars, workplaces, and travel, stocked with a few essentials (bandages, wipes, wipes, antiseptic, pain reliever, and a small pair of gloves).

Tailoring the kit for your household

  • Families with kids: include more adhesive bandages in kid-friendly sizes, extra antiseptic wipes, a digital thermometer, and age-appropriate pain relief meds with clear dosing on the label.
  • Seniors: consider larger-bandage options, extra elastic bandages, and a few enhanced wound-care items – nonstick dressings, wound-care tape with gentle adhesive.

Printable Shopping Checklist

Wound care and dressings

  • [ ] Sterile gauze pads, 4×4 inches: 20
  • [ ] Sterile gauze pads, 2×2 inches: 20
  • [ ] Nonstick sterile dressings: 4
  • [ ] Adhesive bandages, assorted sizes: 100
  • [ ] Antiseptic wipes or solution: 100-count
  • [ ] Antibiotic ointment (topical): 1 tube
  • [ ] Hydrocortisone cream 1%: 1 tube

Bandages, tapes, and wraps

  • [ ] Medical tape, 1 inch wide: 1 roll
  • [ ] Elastic or cohesive bandages: 2
  • [ ] Safety pins (for securing dressings): 1 small box

Tools

  • [ ] Blunt-tipped scissors: 1
  • [ ] Tweezers: 1
  • [ ] Digital thermometer: 1
  • [ ] Small flashlight with extra batteries: 1 set
  • [ ] First aid manual or quick-reference card: 1
  • [ ] Waterproof storage container or first-aid box: 1
  • [ ] Emergency contact information card (printable): 1
  • [ ] Allergy/medication list (laminated or waterproof): 1

Pain relief, antihistamines, and hydration

  • [ ] Acetaminophen (adult): 1–2 bottles
  • [ ] Ibuprofen (adult): 1 bottle
  • [ ] Oral rehydration salts or electrolyte powder: 1 box
  • [ ] Saline solution for eyes/nasal irrigation: 1 bottle
  • [ ] Hydration remedy for kids (pediatric electrolyte solution) optional: 1 box

Injury care

  • [ ] Instant cold packs: 4
  • [ ] Warmth/heat packs (optional, for comfort): 2
  • [ ] Burn gel or nonstick burn dressings: 2–4
  • [ ] Butterfly closures (steri-strips) for small cuts: 1 package
  • [ ] CPR barrier device or face shield (optional): 1

Kids and Seniors – Designed First Aid Items

  • [ ] Kid-friendly bandages and fun shapes: 1 package
  • [ ] Extra-large or easy-grip bandages for seniors: 1–2 boxes
  • [ ] Pediatric dosing chart

Car and travel Kit

  • [ ] Small, separate travel first aid kit: 1
  • [ ] A few bandages, antiseptic wipes, small gloves, and a mini bottle of antibiotic ointment: include in travel kit

Notes

  • Start with the essentials above; you can add specialty items later as needed.
  • If you have children or seniors, prioritize kid-friendly bandages and age-appropriate medicines with clear dosing labels.
  • Keep receipts and product labels for easy checking of expiration dates.
  • Plan for rotation: mark the opened date on items like ointments or saline, and replace before they expire.
  • Consider adding a small printed quick-reference sheet inside the kit lid for fast guidance.

| Declutter the Bathroom | Daily Goal | On-Ramping

Declutter the Bathroom: Essentials, Smart Storage, Clean-Look Colors, and a 60-Minute Decluttering Plan


A cluttered bathroom can make mornings chaotic and showers feel less spa-like. The key is to keep only what you truly use, store the rest where it belongs, and choose colors and organizers that reflect calm and cleanliness. Below is a practical guide you can follow to reclaim your space—without turning it into a full-day project.

What to keep in the bathroom (the essentials)
These items belong in the bathroom vanity or medicine cabinet because they’re used daily or weekly and benefit from being close at hand.

  • Daily hygiene basics
  • Toothbrush, toothpaste, floss, mouthwash
  • Soap or hand wash, facial cleanser, moisturizer
  • Cotton rounds, Q-tips, cotton balls (store in a small drawer or container)
  • Grooming and personal care
  • Hairbrush/comb, razor and replacement blades, shaving cream or gel
  • Daily skincare products (serums, SPF, etc.)
  • Nail care kit (emery boards, clippers)
  • Towels and washcloths (a small, accessible set)
  • One to two hand towels on a rack; a few washcloths tucked in a basket
  • Cleaning essentials (kept discreetly, but within reach)
  • All-purpose cleaner or bathroom cleaner, toilet bowl cleaner and brush, microfiber cloths
  • Toilet paper (a small stock in the bathroom is handy; bulk rolls can live in a hallway/utility closet)
  • First-aid and medications (in a secure, accessible spot)
  • A small first-aid kit and any daily medications should be stored in a locked or childproof cabinet if children are present
  • Minor storage helpers
  • A small trash can with a liner, a dish or tray for everyday items that live on the counter

Items you can relocate from the bathroom

  • Extra toiletries and household supplies you don’t use daily
  • Extra shampoo, conditioner, body wash, or facial products
  • Extra razors, sunscreen, or cosmetics that you don’t reach for weekly
  • Bulk or seasonal items
  • Spare toilet paper, tissues, or cleaning products that aren’t used this week
  • Hair tools and beauty devices you don’t use daily
  • Hair dryers, curling irons, or straighteners can live in a bedroom closet or dedicated “tools” bin
[pms-restrict]

Where to relocate items that are not essentials

  • A dedicated storage zone for bulk and seasonal items
  • Extra towels, towels for guests, and backup toiletries
  • Extra toilet paper, tissues, and paper towels
  • Off-season or specialty items
  • Spare skincare products you aren’t currently using, travel toiletries, backup razors
  • Cleaning supplies and tools
  • If your bathroom has a separate cleaning supply closet or a utility closet, consider moving bulk cleaners and tools there to keep bathroom surfaces clear
  • Seasonal or aspirational items
  • Extra pampering kits, bath bombs, or decorative items that aren’t used regularly

Tips for keeping the bathroom from looking cluttered

  • Clarity over quantity
  • Only keep items you truly use or love; if you haven’t used it in 6–12 months, consider donating or discarding
  • Clear surfaces = clear mind
  • Limit countertop items to 2–3 everyday essentials; everything else goes into drawers, cabinets, or organizers
  • Smart storage solutions
  • Use drawer organizers, vertical risers, and clear acrylic bins to maximize space
  • Install small shelves or a vanity tray to corral daily items

Grouping and labeling

  • Group like items together (oral care, skincare, makeup) and label containers or drawers
  • A “one-in, one-out” rule
    • When you bring a new product home, remove one older product (expired, duplicated, or never used)
  • Seasonal rotation
  • Rotate items every few months; tuck away items you’re not using in a hall closet or storage bin
  • Keep the “bathtub edge” sacred
    • Avoid placing products directly on the tub ledge or edges; use a tray or decant products into a single, flat tray

Daily reset routine

  • Spend 2 minutes at the end of each day wiping surfaces and returning items to their homes
  • Labeling and visibility
  • Use clear containers and labeled shelves so you can see what you have at a glance

Maintenance plan

  • Schedule a quick weekly tidy (5–10 minutes) to wipe, reorganize, and discard what’s no longer needed

Best colors for a bathroom that reads as clean and fresh

Key ideas for “clean-looking” colors

  • Light neutrals dominate: whites, ivories, and soft grays reflect more light and hide minor water spots.
  • Soft warm neutrals are forgiving: creams, warm beiges, and taupes feel tidy and cozy.
  • Gentle cool tones read as fresh: pale blues, sage greens, and seafoam can feel spa-like and clean.
  • Use contrast sparingly: a darker accent (towels, hardware, or a single feature wall) adds depth without making the space feel cluttered.
  • Finish matters: opt for glossy or semi-gloss on walls/trim for more light reflection and easier wipe-downs; matte finishes hide fingerprints but may show moisture more.

Best color families to consider

  • Whites and off-whites: bright, crisp, and timeless.
  • Light grays: modern, versatile, and great with chrome or nickel.
  • Creams and warm beiges: inviting and less stark than pure white.
  • Soft blues and greens: calm, spa-like vibes that still feel clean.
  • Dark accents (sparingly): navy, charcoal, or matte black for hardware or a single accent wall.

Three ready-to-use palettes (with vibe and how to apply)
Palette A: Crisp & Airy

  • Walls/main color: White #FFFFFF or soft off-white #F8F7F0
  • Cabinets/vanity: Very light gray #F0F2F5
  • Accents: Pale blue #DDEBF9 or seafoam #E3F4F6
  • Textiles/hardware: Chrome or brushed nickel
    Why it works: Reflective surfaces and near-monochrome neutrals make the space feel expansive and ultra-clean.

Palette B: Soft Spa Calm

  • Walls/main color: Cream #FFF5E1 or warm beige #F5EFE5
  • Cabinets/vanity: Sage green or soft olive #A8BF9C
  • Accents: Light aqua #D3F6F3 or soft taupe baskets
  • Textures: Light wood, woven baskets
    Why it works: Warm neutrals with a cool, retreat-like accent create a serene, clean look.

Palette C: Fresh & Modern

  • Walls/main color: Pale blue-gray #DDE7F1
  • Cabinets/vanity: White #FFFFFF or near-white gray
  • Accents: Navy #0F2540 or charcoal for a crisp contrast
  • Countertops/tiles: White with subtle gray veining
    Why it works: Subtle color contrast keeps things visually clean and contemporary without feeling clinical.

General color-use guidelines

  • Distribution: aim for 60–80% your main color (walls/large surfaces) and 20–40% accent color (towels, containers, decor).
  • Large-format tiles help: fewer grout lines means fewer places for dirt to show.
  • Lighting matters: pair colors with good lighting (prefer daylight-balanced bulbs) to keep everything looking bright.
  • Consistency is key: stick to 2–3 colors total for a cohesive, uncluttered look.
[/pms-restrict]

|Daily Storey Goal | Clear Out Under the Bed | January Goals | Coaching Prompt |

Why an Empty Under-Bed Space Supports Feng Shui, Calm, and Better Sleep


If you’ve ever felt that your bedroom carries a heaviness or restlessness, the space under the bed might be part of the problem. In many feng shui and energy-focused design ideas, clutter—especially tucked away where you can’t see it—still disrupts the flow of chi. The simple rule: keep the space under your bed empty. Not only can this reduce mental clutter and energy stagnation, it also makes your room easier to clean and helps you sleep more soundly. And yes, the “out of sight, out of mind” tendency is real—when nothing is stored under the bed, there’s nothing to forget about, misplace, or trip over.

Why keeping the space under the bed empty matters

  • Energy flow and rest: Feng shui emphasizes smooth, unobstructed qi (energy) moving through the room. A clear, open under-bed space is believed to encourage a calmer, more balanced energy in the sleeping area.
  • Mental calm and clutter-free nights: Visible clutter in your field of vision adds cognitive load even if you “don’t see” it during the day. An empty under-bed area reduces reminders of tasks or items that demand mental attention.
  • Easier cleaning and maintenance: Dust, allergens, and negative energy can accumulate in between under bed storage containers. Keeping the space empty makes vacuuming and air circulation simpler, supporting a healthier sleep environment.
  • Better sleep quality: A tidy, uncluttered space around the bed is linked—in feng shui and in many sleep-wocused design guides—to deeper, more restorative rest.

Common objections and smart trade-offs

  • “I need extra storage.” Choose away from the bed storage solutions: a stylish dresser, a storage ottoman at the foot of the bed, or a closet system with labeled bins. The goal is to move storage away from under the bed, not to create chaos elsewhere.
  • “False : Seasonal items won’t fit elsewhere.” Create a rotating plan: designate a labeled bin or shelf in a closet for seasonal items, and commit to rotating them on a schedule to an off-site storage location. It’s a short-term trade-off for long-term calm.
  • “I worry about forgetting what I have.” Instead of under-bed storage, use a visible inventory system in your closet or a digital note on your phone. A quick list or photo catalog can replace the mental load of “what’s under there?”
[pms-restrict]

A practical, step-by-step plan to empty the space


Step One: Clear and Inventory

Pull everything out from under the bed. Decide what truly needs to stay in your home and what can be donated , recycled, or trashed.

Reallocate items

Move seasonal or rarely used items to a closet, dresser, or storage ottoman—preferably with a lid to keep dust out.

For items you must access occasionally, use a high-priority, easily accessible storage solution outside the under-bed zone.


Create a Maintenance Rule and Schedule

Implement a strict “no items under the bed” rule. If something must be placed there temporarily, set a 24–48 hour move-out reminder.
Build a nearby, tidy alternative

Add a storage option near or at the foot of the bed (a storage bench or a small chest) for linens, extra blankets, or reading materials. This keeps essentials reachable without tucking them under the bed.

Design for easy cleaning

Vacuum or sweep under the bed at least once a month to prevent dust buildup. If you have a platform bed with a solid frame, consider a quick wipe-down to keep the space fresh.

Integrate feng shui-friendly touches

Keep the area around the bed clear on all sides.

Ensure the bed has a solid headboard and or is anchored to a wall to enhance a sense of security and grounding.

Use soft, calming lighting and avoid electronics directly under or behind the bed to support restful energy.

Simple rules of thumb for an under-bed-free zone

Do not store anything under the bed, even temporarily.

Use closed storage (lidded bins, drawers, or cabinets) for items you need nearby but not beneath the bed.

Keep surfaces around the bed uncluttered: nightstands with only a few essentials, a small tray for daily items, and a calm color palette.

If space is truly tight, prioritize a minimal, high-utility approach: one small storage solution near the bed, not under it.

Enhancing the bedroom’s energy beyond the under-bed rule

Bed placement matters: position the bed so you can see the door while lying down, but avoid direct alignment with the door. A sturdy headboard adds a sense of security.

Lighting and color: soft, warm lighting and calming colors.

[/pms-restrict]

|Sort Wardrobe| January Daily Goal | One Hour |

One Hour a Month to a Seamless Wardrobe: Build a Work Capsule That Balances Work and Home Life


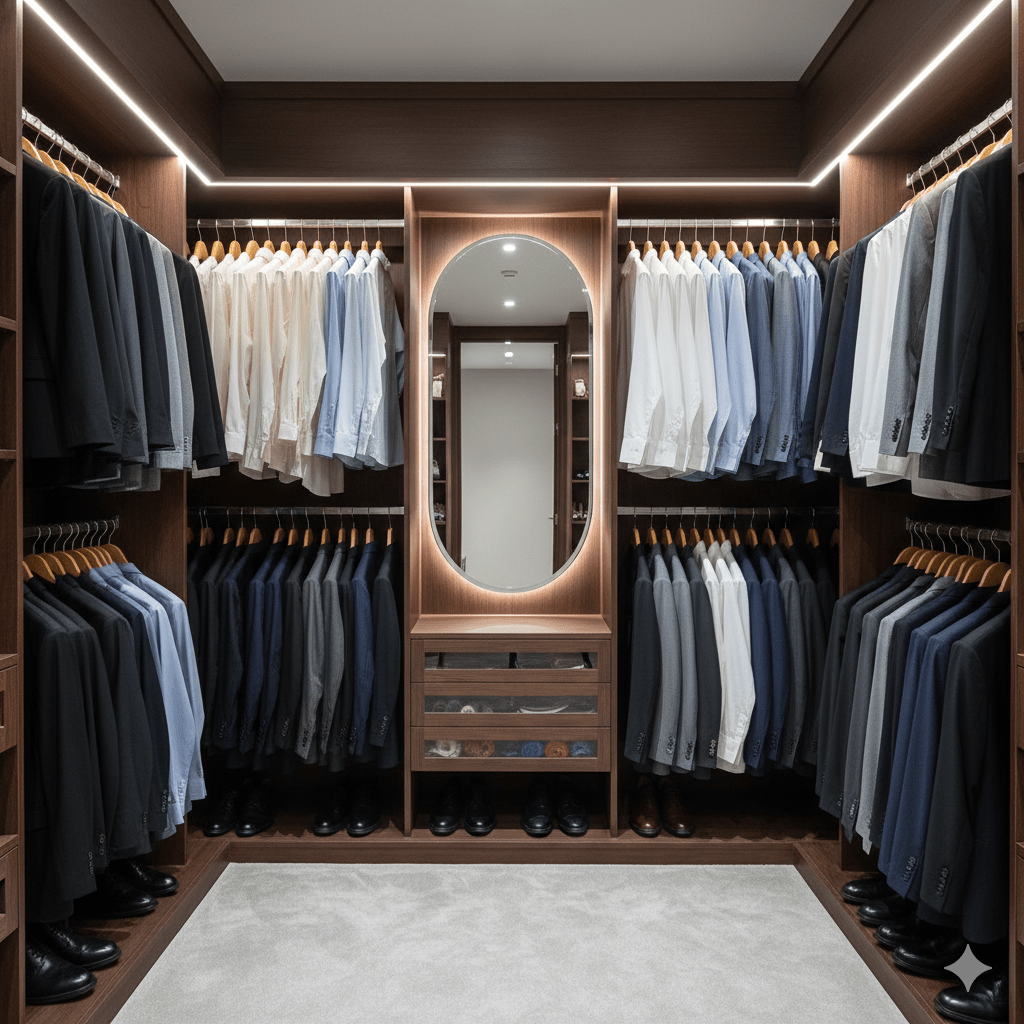
If you’ve ever felt overwhelmed by a closet full of clothes you rarely wear, you’re not alone. A focused, one-hour monthly routine can transform how you dress for work and for home life. The goal is a clear, efficient work capsule you can mix and match with ease, while keeping your casual life wardrobe distinct. Below is a simple, repeatable process you can run every month to sort, prune, and optimize your outfits.

Why a monthly one-hour wardrobe routine works

  • It’s pragmatic. Thirty to sixty minutes creates a consistent habit and allows you to sort your wardrobe but not invest the day in thinking about each outfit.
  • It keeps you agile. A small, well-curated work capsule makes daily choices faster and reduces stress.
  • It preserves balance. Having a separate weekend wardrobe or after work wardrobe helps you turn off work and focus on your home-life.
  • It adapts to life. You can adjust the size of your capsule by season, workload, or laundry schedule and budget.

Setting up a dedicated work capsule

Create two defined closets or sections:

  • Work capsule: only your work-appropriate tops, bottoms, dresses, jackets, and shoes.
  • Home-life wardrobe: casual wear, day wear, weekend wear, gym wear and special event outfits that are too formal for work.

Choose a cohesive color palette:

  • Neutrals you can pair easily | Neutral Colours = black, navy, gray, white |
  • One or two accent colors to keep things interesting

Focus on fabrics and care:

  • Pick fabrics that hold shape and color after washing (poly blends, ponte, wool blends, cotton).
  • Plan outfits that don’t require delicate handling if laundry is limited.

Build with a simple structure:

  • Tops: mostly versatile blouses, shirts, or knits
  • Bottoms: Tailored trousers, dark jeans, skirts
  • Outerwear: 2-3 blazers to make work suits
  • Dresses (women) : suit dresses

Shoes and accessories:

  • 2-3 work-appropriate shoes, loafers, low heels, boots
  • A small set of accessories to add personal style
  • Socks – enough to get through the week without doing laundry
[pms-restrict]

How many work outfits should you keep in the capsule wardrobe?


A practical starting point is a two-week work rotation, with a little extra for variety. A common, easy-to-manage target is 14–16 work outfits for a typical two-week cycle.

Build these outfits from:

  • Tops: 8–10 versatile options.
  • Bottoms: 4–6 pieces (trousers and/or skirts that pair with nearly every top).
  • Outerwear: 2–3 jackets or cardigans to switch up looks without adding a lot of pieces.
  • Dresses (optional): 0–2 if your work style supports it.

Why this range works:

  • It gives you enough variety to avoid repetition while still making laundry, ironing, and maintenance manageable.
  • It creates enough outfits to cover five workdays per week for two weeks, with a little cushion for special events or meetings.
  • It’s flexible: if you wash weekly, you can start with 10–12 outfits and add a couple more as you become confident with the system.

A 60-minute monthly routine. Use a timer if you like; the goal is a declutter routine you can complete each month.

  • Gather all clothes that you think might belong in the work capsule tops, bottoms, jackets, dresses, shoes, and accessories. Remove all clothing items from the wardrobe that you would not wear for work.
  • Remove items that are too stretched, too tight, or worn out.
  • Note items that look dated or are uncomfortable. Place them in storage or in a bag for alterations or sending to Charity.
  • Keep only what fits and aligns with your work goals and work dress code.
  • Keep the work capsule on one side of the closet.
  • Move the home-life wardrobe to the other side of the closet.

If you still have time in your monthly hour, organize clothing into capsules and consider new purchases.

Workspace setup:

Use labeled hangers for work items; keep your work capsule visually distinct from home items.

Build the work capsule:

  • Choose 8–10 tops and 4–6 slacks, jeans, or skirts.
  • Add 2–3 jackets that mix and match with multiple outfits.
  • Add 0–2 dresses if suited to your work environment.
  • Select 2–3 pairs of work shoes

If you like being organized, keep an inventory of your clothing and items to buy to strengthen your work capsules.

[/pms-restrict]

Cleaning Goal | Cleaning Around the Bed | Health Storey January |

Welcome to Monday! I’m working on the corporate paperwork and training an AI but the cleaning Goal for you and for myself today is:

| Clearing the space around the bed – Decluttering – Getting rid of visual stress |

Did you drink your coffee today? For detoxification, it is important to have coffee in the morning with some dairy. You can have dairy in your coffee or have a piece of cheese. Health Storey Coaches can explain to you the importance of coffee with dairy milk.

Clear Space, Clear Mind: The Importance of Minimal Visual Clutter in the Bedroom (Especially Around the Bed)

If your bedroom feels like a staging room for everything you own, your sleep routine might be paying the price. Visual clutter can drain energy, disrupt relaxation, and even make mornings feel chaotic. The good news? A simple, deliberate approach to keeping the space around your bed free of clutter can transform how you rest, recharge, and wake up. Here’s why it matters and how to make it work in real life.

Why visual clutter around the bed matters

  • Sleep quality and stress: A calm, orderly environment signals to your brain that it’s time to unwind. When surfaces are crowded with books, devices, and laundry, your brain has more stimuli to process at a time when it should be winding down. A cleaner visual field can help reduce cognitive load and promote deeper, more restorative sleep.
  • Safety and ease: The bed is the room’s center of comfort, but it’s also a potential trip hazard if cords, shoes, or laundry spill into the floor or nightstands. Keeping the space around the bed clear reduces the risk of stumbles at night and makes it easier to get in and out of bed.
  • Routine and mental clarity: A tidy bedside area supports a smoother evening routine. When you know exactly where the essentials live (lamp, water bottle, a notebook, a charger), you waste less time searching and more time relaxing or drifting off.
  • Ambiance and mood: Clutter clashes with a tranquil mood. A minimal, uncluttered vibe—soft textures, warm lighting, and a cohesive color palette—creates a sanctuary-like feel that’s inviting to rest.

What “clutter around the bed” typically looks like

  • Nightstands overloaded with gadgets, cables, and random papers
  • Cables and chargers sprawling across surfaces or the floor
  • Stacks of books, magazines, or laundry piles near the bed
  • Decorative items that aren’t used for sleep, right at eye level
  • Under-bed storage that’s overflowing or difficult to access
Content Below is for Subscribers to Daily Storey
[pms-restrict]

A practical path to a clutter-free bed space

Step 1: Start with the essentials, then edit

  • Identify 2–3 bedside essentials you actually use within reach (e.g., a lamp, a water glass or bottle, a phone or book, and a small notepad/pen). Anything beyond that is optional.
  • Use a shallow tray or small container on each nightstand for items you want to keep out but corralled (watch, jewelry, coins, remotes). This keeps surfaces visually calm.

Step 2: Tidy cords and devices

  • Create a dedicated charging station away from the bed line (a small shelf or a corded tray at the foot of the bed works well). Use cord organizers or a simple rubber grommet to route cables neatly to a power strip.
  • Consider wireless charging for fewer cables on the nightstand, but don’t let the charging clutter migrate to the floor or be visible as a tangle.
  • If you don’t need a device at bedtime, place it out of arm’s reach or in another room to reduce wakeful scrolling.

Step 3: Manage books, papers, and clutter hotspots

  • Limit the number of books or magazines in the bedroom. If you have stacks, move them to the living room or other rooms for storage. Rotate a single “current read” and place others neatly in a low, closed-storage bin or on a shelves by category.
  • No paper in the bedroom. Place a small filing tray or a magazine holder near the door on a dresser or in a closet to deal with papers and get them to where they can be filed or properly stored. Recycle or scan what you don’t need to keep in physical form.

Step 4: Reassess under-bed storage | We will talk about this again later in the week. |

  • A clear under-bed area feels instantly more open. If you need storage, choose flat, uniform containers that slide easily and label them. Avoid dark, bulky bins that invite you to shove more items under there.

Step 5: Create a safety-first layout

  • Keep walkways clear. A clear path from the bed to the door reduces bumping into furniture in the dark and breaking your foot.

Step 6: Design for calm

  • Embrace a neutral colour palette and soft textures. Neutral walls, low-contrast bedding, and minimal décor help the room stay calm.
  • Choose warm light bulbs. A single bedside lamp with a warm bulb sets a soothing and calming room lighting.
  • Add one plant that likes being near humans and recycling our air quality.

Practical routines to keep clutter at bay

  • Before bed, set a timer and put away items, straighten the nightstand and make sure there is nothing random on the floor. It’s quick, and you’ll wake to a tidy space.
  • One-in, one-out rule: For every new item that comes into the bedroom (a book, a gadget, clothing), remove another item. This keeps accumulation under control.
  • Daily laundry: Place dirty clothes in a hamper or in the washer and away from the bed to prevent piles from forming on the floor or chair.

Quick wins for Cleaning

  • Replace a cluttered nightstand with a single tray and two essentials: a small lamp and a water bottle. Remove all other items.
  • Install a cable management solution (cord clips, a shallow tray, or a small box) to hide or organize charging cables.
  • Clear the floor around the bed on each side.
  • Use dedicated closet storage or storage furniture to keep items that are required for bedroom storage.
[/pms-restrict]