First, be specific: Tie your compliment to a concrete example or behavior.
Second, focus on work ethic, empathy, problem-solving, or creativity.
Third, keep it brief using one or two sentences.
Fourth, center on actions, skills, or personality not looks.
Lastly, deliver in a personal way, through text or note or face to face, and in the correct context.
Here is a thoughtful compliment that doesn’t add flirting to the conversation to use as a template:
“I really appreciate your follow through on this commitment. It makes us feel more confident and able to keep moving forward.”
Customization ideas
Keep your compliments friendly and specific to your everyday.
If you’re uncertain about the tone: choose one compliment and deliver it in a straightforward, plain-spoken way without extra flourish. Do not use words that are not in your everyday vocabulary.
Genuine compliments focus on effort, character, and contribution can strengthen rapport and respect across genders. Keep your comments specific, sincere, and non-romantic, you’ll make someone feel valued for who they are and what they do—no flirting required today.
Daily goals to get you travel-ready and eating more vegetables this February.
As you plan trips and look toward a healthier routine, this week’s newsletter brings you a practical, easy-to-follow prep plan. We’ve lined up daily goals to get your space, your packing, and your meals on track—plus a February veggies spotlight to keep your plate vibrant even while you’re on the go.
This Week’s Daily Goals
– Monday, January 26: Empty Trash from House
– Tuesday, January 27: Organize a Drawer
– Wednesday, January 28: Vacuum the House
– Thursday, January 29: Prepare to Leave on a Trip
– Friday, January 30: Organize Travel Bags, Clean Them
– Saturday, January 31: Travel Luggage for a Weekend
– Sunday, February 1: February is About Eating More Vegetables
Healthy Travel Prep: Quick Tips
– Hydration on the go: Carry flavour packets. My favourite drink mix contains 3 grams of electrolytes that hydrate and add flavour to city tap water or bottle of water you purchase at the store. If you are packing light, you do not need to bring your own drink containers on your trip.
– Smart Lunch options: Before lunch or dinner, eat a handful of nuts to add protein to your meal. While traveling, your meals may not be as balanced or may contain less protein than at home.
-Focus on Neat Movement: You will be on a flight, spend the time at the airport standing or walking around. Track your mileage on your phone. Make sure to use the bathroom before getting on the plane and limit what you eat while flying. Grab a beverage when you land to drink while going through customs and picking up your luggage.
Sleep: Take ear buds and a travel pillow. You can buy a travel pillow at the airport for around ten dollars and give it to someone as a gift. Once you are at your destination, stay awake as long as you can to avoid jet lag. Carry a compact eye mask, earplugs, a small pillow, and a reusable tote for day trips.
Travel health kit: Grab the first aid kit you created for traveling and make sure it includes: basic bandages, antiseptic wipes, pain relievers, any personal meds, homemade ginger candy.
Focus of February 2026 Daily Goals
Vegetables
– Veggies of the Month: Bok choy Mushrooms, Peppers and Lettuce. Each week the focus will be on adding vegetables to our rice for breakfast and lunch.
Topics for Feb: Quick Prep for Veggies, Storage ideas and nutritional information and research on different vegetables being added into the Daily Story month.
Best Office Layouts for a Productive, Adaptable Workplace
The layout of an office does more than just hold desks and chairs. It shapes how people collaborate, where deep work gets done, and how a company adapts to change. A great office layout supports your culture, keeps people engaged, and scales with growth. The challenge is balancing openness with privacy, collaboration with focus, and cost with comfort. Below are the most effective layouts you’ll see in modern offices, along with when they shine, common pitfalls, and practical tips to make them work for your team.
Open-Plan / Collaborative Layout What it is: Long rows or clusters of desks with minimal walls, designed to enable quick conversations and spontaneous collaboration.
Pros
Fosters quick communication and teamwork.
Maximizes floor space and can feel more energetic and inclusive.
Easier to reconfigure as teams shift.
Cons
Noise and visual distractions can hurt focus.
Some employees may feel exposed or exposed to interruptions.
When it shines
Creative, design, and sales teams that rely on rapid feedback.
Startups or fast-growing teams that prioritize collaboration over privacy.
Use zones: dedicate specific areas for heads-down work and others for collaboration.
Create “quiet corners” with taller furniture or screens for focused work.
Introduce visual cues to signal when someone is in deep work mode (e.g., desk nameplates, signals, or status indicators).
Activity-Based Work Layout What it is: A campus-like approach with distinct zones for different activities—focus, collaboration, socializing, and breakout work—often with a mix of furnishings and clever wayfinding.
Pros
Supports varied work styles within one space.
Encourages collaboration in the right spaces and privacy when needed.
Flexible by design; easy to reallocate areas without major construction.
Cons
Requires thoughtful planning and clear usage guidelines.
Can feel chaotic if zones aren’t well defined or poorly signed.
When it shines
Teams with a mix of roles: developers who need deep focus, marketers who need collaboration, and managers who host meetings.
Companies undergoing frequent project shifts or process changes.
Practical Tips
Map activities to spaces: designate dedicated rooms or zones for focus, meetings, quick huddles, and social areas.
Plan sightlines and wayfinding: clear arrows, color-coded zones, and signage help people find the right space quickly.
Invest in flexible furnishings: height-adjustable desks, mobile whiteboards, and movable screens to morph spaces as needs change.
Consider acoustics in open areas: soft furnishings, wall panels, and ceiling treatments to keep background noise manageable.
Cellular Private Offices / Mixed Privacy Layout What it is: A mix of private offices or enclosed workstations with doors, balanced by shared spaces for meetings and collaboration.
Pros
Strong privacy and reduced interruptions for deep work.
Clear delineation between management and staff in many designs.
Cons
Can feel isolating and reduce spontaneous collaboration if overused.
Higher real estate costs per employee and potential underutilization.
When it shines
Roles that require confidentiality or extensive concentration (legal, finance, R&D, senior leadership).
Teams that need predictable meeting rooms and private spaces for sensitive conversations.
Blend with open, collaborative zones to avoid isolation.
Use glass or transparent partitions to maintain a sense of openness while preserving privacy.
Create “office adjacencies” for quick interactions: place meeting rooms and quiet rooms near teams to minimize long walks.
Hybrid / Breakout-Heavy Layout What it is: A flexible mix of small nooks, breakout lounges, informal seating, and short-task desks designed to support quick, informal work sessions and meetings.
Pros
Encourages informal collaboration and rapid problem-solving.
Feels modern and approachable, often improving employee satisfaction.
Cons
Can suffer from underuse if spaces aren’t inviting or properly scheduled.
Requires ongoing management to keep reservation systems simple and fair.
When it shines
Teams that brainstorm frequently, run standups, or host clients in-house.
Offer a spectrum of breakout formats: high-top tables for quick chats, lounge seating for relaxed discussions, and semi-enclosed nooks for privacy.
Implement a simple booking or “first-come, first-served” system to avoid crowding and overlap.
Provide writing surfaces and digital collaboration tools in breakout areas to capture ideas quickly.
Modular / Flexible Layouts with Movable Walls What it is: Floor plans built with demountable walls, modular furniture, and easy-to-reconfigure components that evolve with your business.
Pros
Extremely adaptable to headcount changes or new workflows.
Protects long-term space value by enabling reconfiguration rather than relocation.
Cons
Higher initial investment and planning effort.
Requires ongoing management to keep the space coherent.
When it shines
Growing companies, firms that pivot often, or businesses planning frequent internal reorganizations.
Spaces that host rotating teams or cross-functional projects.
Practical tips
Plan for scalable zones: design core areas that can be expanded with modular inserts.
Choose modular furniture with multiple configurations to support different activities.
Keep electrical, data, and HVAC in mind; plan for future needs when you install partitions.
Deskless / Hot-Desking Layout What it is: A system where employees don’t have assigned desks; they choose a workstation when they arrive, often guided by a booking app.
Pros
Maximizes real estate efficiency; good for hybrid or remote-heavy teams.
Encourages movement and interaction across departments.
Cons
Personalization can be tough; some people struggle to leave belongings behind.
Requires strong IT and facilities support to manage bookings, equipment, and entry access.
When it shines
Companies with strong hybrid work policies or limited on-site needs.
Teams that travel between client sites or work remotely part
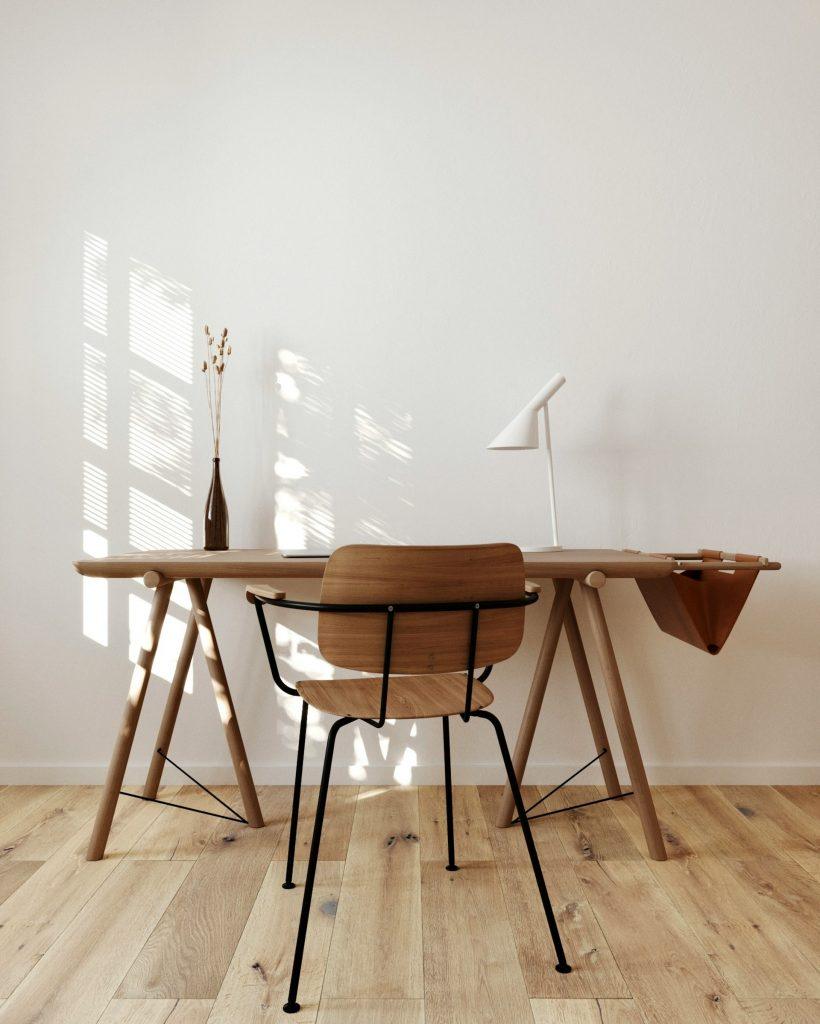
What are we writing about today? Building a calm, productive home office with smart layout, clever storage, and simple maintenance habits that keep clutter at bay—without sacrificing style or comfort.
Monday : Daily Health Storey Goal | Clear off your desktop for one hour.
Working from home can blur the line between living space and workspace, which often leads to clutter creep. The goal isn’t a sterile office; it’s a space that feels calm, functions efficiently, and still reflects your personality. Below is a practical guide to designing a home office that stays neat through smart layout, thoughtful storage, and easy maintenance routines.
[pms-restrict]
Start with your needs and the space you have
Define purpose: writing, video calls, design work, or a combo. Your workflow dictates furniture and storage choices.
Measure and plan: note doorways, window light, and power outlets. Sketch a simple layout with a desk, chair, and at least one storage solution.
Consider traffic flow: leave at least 3 feet of clear space for movement and easy access to frequently used items.
Pick a layout that minimizes clutter
Desk against a wall with clearance behind you for movement and cable routing.
Corner or L-shaped setups for compact rooms that still offer generous work surface.
Wall-mounted options: fold-down desks or wall shelves to maximize floor space in small rooms.
Create clear work zones
Work zone: primary desk surface for computer, keyboard, and task tools.
Storage zone: filing cabinets, shelves, and labeled containers within arm’s reach.
Focus/meeting zone: a small area free of nonessential items for calls or quick brainstorms.
Personal zone: one or two items that bring you joy but don’t overwhelm the space.
Desk and surface essentials for a tidy vibe
Choose a clean, unobtrusive desk: simple lines, a finish that hides fingerprints, and enough depth for monitors.
Minimalist monitor setup: one or two screens, neatly mounted if possible, to reduce desk clutter.
Surface discipline: limit to essentials only—monitor, keyboard, a notebook or planner, and one decorative but compact item.
Smart storage that actually gets used
Vertical solutions: tall bookcases, wall-mounted shelves, or pegboards to keep items off the desk.
Hidden storage: under-desk drawers, rolling carts, or slim filing cabinets for papers.
Clear labeling: use consistent labels for folders, boxes, and bins to speed up tidying.
Drawer strategy: implement multi-compartment organizers for pens, cables, and supplies.
Cable management that makes a difference
Centralize power: use a single power strip with a tidy cord sleeve.
Route cords out of sight: clips, channels, and adhesive cable organizers along the desk edge or behind the desk.
Wireless first: where possible, choose wireless peripherals and cloud-based workflows to reduce cables.
Hide the chaos: a shallow cable box or basket keeps cords contained and out of view.
Personalization, but keep it calm
One or two meaningful items: a small photo frame, a single plant, or a favorite trophy—kept tidy and minimal.
Plant life: choose a low-maintenance plant to add life without creating mess or extra care.
Color restraint: a cohesive palette (2–3 colors) for accessories helps the space feel intentional and serene.
Lighting and ergonomics for long work sessions
Natural light first: place the desk near a window if possible, but avoid screen glare.
Task lighting: a good desk lamp with adjustable brightness reduces eye strain.
Ergonomics: monitor at eye level, chair supports your lower back, and keyboard/mouse within easy reach to prevent clutter and fatigue.
Maintenance routines that keep neatness effortless
Daily 5-minute reset: close the laptop, return items to their designated spots, and straighten the desk.
Weekly tidy: purge old papers, dust surfaces, and wipe down electronics.
Monthly deep clean: clean monitor screens, keyboards, and refresh storage zones if you notice drift or dust buildup.
Quick digital tidy: routinely organize files in the cloud or on your computer to prevent “digital clutter” that mirrors physical clutter.
Small-space hacks that really work
Foldable or wall-mounted desk options for ultra-tight rooms.
Stackable storage or modular units that can be reconfigured as needs change.
Floating felt or cork boards for notes and inspiration without taking up desk real estate.
Use color-weighted cues: match the color of storage bins to the wall to create a seamless, less cluttered look.
A simple, repeatable routine you can actually keep
The 10-minute Friday reset: clear the week’s leftovers, archive completed tasks, and prep the space for Monday.
The “one-touch” rule for paperwork: deal with a document the first time you touch it (file, action, or discard).
The weekly inventory check: ensure you aren’t accumulating unused gadgets or supplies.
If you share the space or have a multi-use room
Separate visually: use a small area rug, curtain, or room divider to define the office area.
But keep it practical: ensure you still have easy access to shared items and maintain a tidy, respectful zone for others.
The Desk Plan
Clear, measure, and draft a simple layout.
Choose storage solutions and implement a clean desk policy.
Route cables and install a discreet cable management system.
Add one plant and a small personal item.
Set up a daily 5-minute reset routine.
Create a weekly 15-minute tidy ritual.
Review usability and adjust zones or storage as needed.
Before and after: visualizing the transformation
Before: a crowded desk with loose papers, tangled cables, and a hodgepodge of items.
After: a calm, organized space with a clean desk surface, clearly labeled storage, and a couple of personal touches that don’t overwhelm.
Practical tips to maximize impact
Stick to a consistent color palette for accessories to create a cohesive look.
Invest in one high-quality, functional item (chair, desk mat, or storage unit) to reduce clutter and improve usability.
Let the space reflect your workflow—don’t display items you don’t use regularly.
Keep an inbox tray or digital inbox for incoming items
Laundry 101: What to Wash, How to Choose Detergents, and How to Dry Things Right
Laundry Lab: Washing Everything That Belongs in the Washer
Keeping a busy home fresh and organized starts with smart washing and drying habits. In this issue, we simplify what can go in your washer, which detergents to use, and which fabrics should stay out of the dryer or need special care. Quick tip: always check garment care labels first—they’re the best guidance for each item.
Section 1: What can go in the washer
– Everyday cottons and linens: shirts, jeans, towels, bed sheets. Use warm or cold water depending on soil level and colorfastness; wash darks separately from lights.
– synthetics and blends (polyester, nylon, spandex): generally fine on cold or warm cycles; many hold color well.
– Delicates and sweaters: use a gentle or delicate cycle; consider a mesh bag for small items.
– Athletic wear: wash in cold water to protect elasticity; avoid fabric softeners which can reduce moisture-wicking.
– Kids’ clothing and bibs: follow label care; use fragrance-free detergent if there are sensitivities.
– Bedding and bath towels: can often handle warm water; use a longer cycle for bulky items.
– How to sort: by color (lights, darks, bright colors), by fabric type (delicates separately), and by soil level (heavy soils separate from lightly soiled items).
Section 2: Detergents to use
– Types of detergents:
– Liquid detergents: great for greasy stains and pre-treating; easy to measure.
– Powder detergents: often cost-effective; good for hard water when paired with a water-softening booster.
– Detergent pods/pacs: convenient, but use only one per load and keep out of reach of kids.
– Fragrance-free or dye-free options: better for sensitive skin or households with allergies.
– High-efficiency (HE) washers vs standard machines:
– If you have an HE washer, use HE detergents. They produce fewer suds and work best with reduced water.
– If you have a standard washer, regular detergents work fine, but follow the label for the correct amount.
– How much to use:
– Follow the product label; a typical small-to-medium load often uses less than the cap suggests.
– For hard water, you may need a little more detergent or a water-softening booster.
– Special boosters (optional):
– Oxygen-based bleach for whites and color-safe brightening (avoid chlorine bleach on colored fabrics and delicate fibers).
– Stain pretreaters for tough spots (grease, wine, grass). Test on hidden seam first.
– Tips for sensitive households:
– Choose fragrance-free, dye-free detergents.
– Rinse cycles matter; extra rinse can help remove detergent residue that irritates skin.
Section 3: What can be dried in the dryer vs. what should air-dry
– Dryer-friendly items (low to medium heat; shorter cycles help extend life):
– Most cottons and poly-cotton blends
– Synthetic fabrics (polyester, nylon blends)
– Towels and bath sheets
– Sweatshirts and fleece (watch for pilling)
– Delicates and items to air-dry or lay flat:
– Wool and cashmere sweaters (lay flat to preserve shape)
– Silk, satin, and delicate tops (use a lingerie bag or air-dry)
– Rayon/viscose and some duplex fabrics (check care label; many are air-dry only)
– Certain knitted patterns and beaded garments (premature shrinkage risk)
– What “dry-clean only” really means for home laundry:
– Dry-clean-only items should not go in a home washer or dryer unless the care label explicitly says otherwise.
– If you’re ever unsure, test with a small, inconspicuous area or take to a professional cleaner.
– Practical tips to dry efficiently:
– Clean the lint screen before every load to maximize drying efficiency.
– Use the right heat setting: low/air-dry for delicates; medium heat for most cottons; high heat only for sturdy items that tolerate it.
– Use dryer balls or clean tennis balls to help bounce and reduce drying time for bulky items like towels and blankets.
– Remove items promptly to minimize wrinkles; fold or hang after they’re dry.
Section 4: Quick home laundry routine templates
– Everyday casual path: cold wash for most colors, gentle cycle for delicates, air-dry or low-heat for delicate pieces.
– Towels and bedding path: warm wash if soil is moderate, longer dry on medium heat, add dryer balls to speed up drying.
Section 5: Troubleshooting tips
– If colors bleed: wash separate for the first few cycles or use color-catching sheets.
– Lingering odors: rewash with a bit more detergent and add a half cup of baking soda to the wash.
– Clothes shrinking after a warm wash: avoid high heat; re-wet, re-shape, and air dry if possible.
– Detergent residue on clothes: add an extra rinse cycle or run an extra rinse on the machine.
Section 6: A quick care checklist
– Always check care labels before washing.
– Sort by color, fabric type, and soil level.
– Use the appropriate detergent and the recommended dose.
– Match water temperature to the fabric and soil.
– Dry items on the recommended setting; avoid high heat on delicates.
Daily Goals for this Week
Monday – Clear Desk Space
Tuesday – Sort Paperwork
Wednesday – Tidy Desk Drawer
Thursday – Organize Digital Files
Friday – Clean Keyboard
Saturday – Create Functional Workspace
Sunday – Add personal Touches to work space at work and home
Declutter the Bathroom: Essentials, Smart Storage, Clean-Look Colors, and a 60-Minute Decluttering Plan
A cluttered bathroom can make mornings chaotic and showers feel less spa-like. The key is to keep only what you truly use, store the rest where it belongs, and choose colors and organizers that reflect calm and cleanliness. Below is a practical guide you can follow to reclaim your space—without turning it into a full-day project.
What to keep in the bathroom (the essentials) These items belong in the bathroom vanity or medicine cabinet because they’re used daily or weekly and benefit from being close at hand.
Daily hygiene basics
Toothbrush, toothpaste, floss, mouthwash
Soap or hand wash, facial cleanser, moisturizer
Cotton rounds, Q-tips, cotton balls (store in a small drawer or container)
Grooming and personal care
Hairbrush/comb, razor and replacement blades, shaving cream or gel
Daily skincare products (serums, SPF, etc.)
Nail care kit (emery boards, clippers)
Towels and washcloths (a small, accessible set)
One to two hand towels on a rack; a few washcloths tucked in a basket
Cleaning essentials (kept discreetly, but within reach)
All-purpose cleaner or bathroom cleaner, toilet bowl cleaner and brush, microfiber cloths
Toilet paper (a small stock in the bathroom is handy; bulk rolls can live in a hallway/utility closet)
First-aid and medications (in a secure, accessible spot)
A small first-aid kit and any daily medications should be stored in a locked or childproof cabinet if children are present
Minor storage helpers
A small trash can with a liner, a dish or tray for everyday items that live on the counter
Items you can relocate from the bathroom
Extra toiletries and household supplies you don’t use daily
Extra shampoo, conditioner, body wash, or facial products
Extra razors, sunscreen, or cosmetics that you don’t reach for weekly
Bulk or seasonal items
Spare toilet paper, tissues, or cleaning products that aren’t used this week
Hair tools and beauty devices you don’t use daily
Hair dryers, curling irons, or straighteners can live in a bedroom closet or dedicated “tools” bin
[pms-restrict]
Where to relocate items that are not essentials
A dedicated storage zone for bulk and seasonal items
Extra towels, towels for guests, and backup toiletries
Extra toilet paper, tissues, and paper towels
Off-season or specialty items
Spare skincare products you aren’t currently using, travel toiletries, backup razors
Cleaning supplies and tools
If your bathroom has a separate cleaning supply closet or a utility closet, consider moving bulk cleaners and tools there to keep bathroom surfaces clear
Seasonal or aspirational items
Extra pampering kits, bath bombs, or decorative items that aren’t used regularly
Tips for keeping the bathroom from looking cluttered
Clarity over quantity
Only keep items you truly use or love; if you haven’t used it in 6–12 months, consider donating or discarding
Clear surfaces = clear mind
Limit countertop items to 2–3 everyday essentials; everything else goes into drawers, cabinets, or organizers
Smart storage solutions
Use drawer organizers, vertical risers, and clear acrylic bins to maximize space
Install small shelves or a vanity tray to corral daily items
Grouping and labeling
Group like items together (oral care, skincare, makeup) and label containers or drawers
A “one-in, one-out” rule
When you bring a new product home, remove one older product (expired, duplicated, or never used)
Seasonal rotation
Rotate items every few months; tuck away items you’re not using in a hall closet or storage bin
Keep the “bathtub edge” sacred
Avoid placing products directly on the tub ledge or edges; use a tray or decant products into a single, flat tray
Daily reset routine
Spend 2 minutes at the end of each day wiping surfaces and returning items to their homes
Labeling and visibility
Use clear containers and labeled shelves so you can see what you have at a glance
Maintenance plan
Schedule a quick weekly tidy (5–10 minutes) to wipe, reorganize, and discard what’s no longer needed
Best colors for a bathroom that reads as clean and fresh
Key ideas for “clean-looking” colors
Light neutrals dominate: whites, ivories, and soft grays reflect more light and hide minor water spots.
Soft warm neutrals are forgiving: creams, warm beiges, and taupes feel tidy and cozy.
Gentle cool tones read as fresh: pale blues, sage greens, and seafoam can feel spa-like and clean.
Use contrast sparingly: a darker accent (towels, hardware, or a single feature wall) adds depth without making the space feel cluttered.
Finish matters: opt for glossy or semi-gloss on walls/trim for more light reflection and easier wipe-downs; matte finishes hide fingerprints but may show moisture more.
Best color families to consider
Whites and off-whites: bright, crisp, and timeless.
Light grays: modern, versatile, and great with chrome or nickel.
Creams and warm beiges: inviting and less stark than pure white.
Soft blues and greens: calm, spa-like vibes that still feel clean.
Dark accents (sparingly): navy, charcoal, or matte black for hardware or a single accent wall.
Three ready-to-use palettes (with vibe and how to apply) Palette A: Crisp & Airy
Walls/main color: White #FFFFFF or soft off-white #F8F7F0
Cabinets/vanity: Very light gray #F0F2F5
Accents: Pale blue #DDEBF9 or seafoam #E3F4F6
Textiles/hardware: Chrome or brushed nickel Why it works: Reflective surfaces and near-monochrome neutrals make the space feel expansive and ultra-clean.
Palette B: Soft Spa Calm
Walls/main color: Cream #FFF5E1 or warm beige #F5EFE5
Cabinets/vanity: Sage green or soft olive #A8BF9C
Accents: Light aqua #D3F6F3 or soft taupe baskets
Textures: Light wood, woven baskets Why it works: Warm neutrals with a cool, retreat-like accent create a serene, clean look.
Palette C: Fresh & Modern
Walls/main color: Pale blue-gray #DDE7F1
Cabinets/vanity: White #FFFFFF or near-white gray
Accents: Navy #0F2540 or charcoal for a crisp contrast
Countertops/tiles: White with subtle gray veining Why it works: Subtle color contrast keeps things visually clean and contemporary without feeling clinical.
General color-use guidelines
Distribution: aim for 60–80% your main color (walls/large surfaces) and 20–40% accent color (towels, containers, decor).
Large-format tiles help: fewer grout lines means fewer places for dirt to show.
Lighting matters: pair colors with good lighting (prefer daylight-balanced bulbs) to keep everything looking bright.
Consistency is key: stick to 2–3 colors total for a cohesive, uncluttered look.
Why an Empty Under-Bed Space Supports Feng Shui, Calm, and Better Sleep
If you’ve ever felt that your bedroom carries a heaviness or restlessness, the space under the bed might be part of the problem. In many feng shui and energy-focused design ideas, clutter—especially tucked away where you can’t see it—still disrupts the flow of chi. The simple rule: keep the space under your bed empty. Not only can this reduce mental clutter and energy stagnation, it also makes your room easier to clean and helps you sleep more soundly. And yes, the “out of sight, out of mind” tendency is real—when nothing is stored under the bed, there’s nothing to forget about, misplace, or trip over.
Why keeping the space under the bed empty matters
Energy flow and rest: Feng shui emphasizes smooth, unobstructed qi (energy) moving through the room. A clear, open under-bed space is believed to encourage a calmer, more balanced energy in the sleeping area.
Mental calm and clutter-free nights: Visible clutter in your field of vision adds cognitive load even if you “don’t see” it during the day. An empty under-bed area reduces reminders of tasks or items that demand mental attention.
Easier cleaning and maintenance: Dust, allergens, and negative energy can accumulate in between under bed storage containers. Keeping the space empty makes vacuuming and air circulation simpler, supporting a healthier sleep environment.
Better sleep quality: A tidy, uncluttered space around the bed is linked—in feng shui and in many sleep-wocused design guides—to deeper, more restorative rest.
Common objections and smart trade-offs
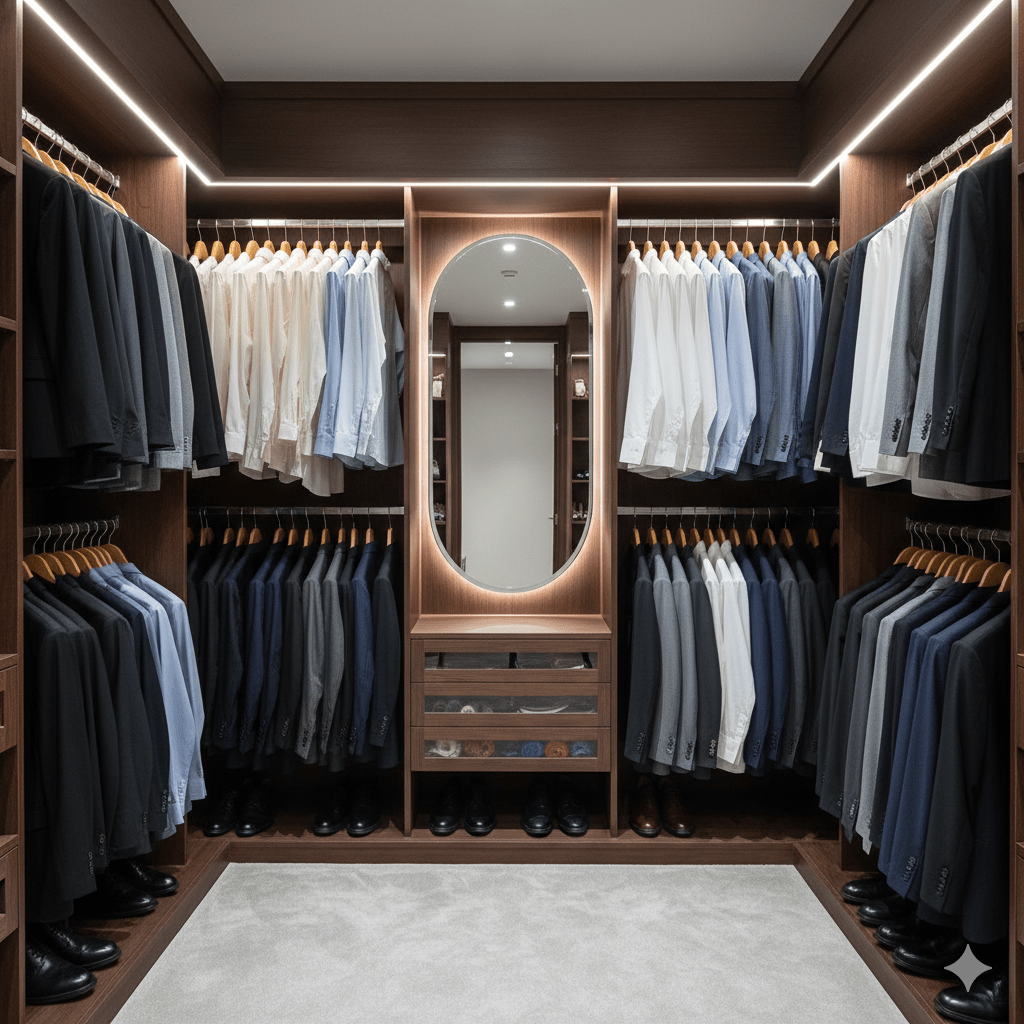
“I need extra storage.” Choose away from the bed storage solutions: a stylish dresser, a storage ottoman at the foot of the bed, or a closet system with labeled bins. The goal is to move storage away from under the bed, not to create chaos elsewhere.
“False : Seasonal items won’t fit elsewhere.” Create a rotating plan: designate a labeled bin or shelf in a closet for seasonal items, and commit to rotating them on a schedule to an off-site storage location. It’s a short-term trade-off for long-term calm.
“I worry about forgetting what I have.” Instead of under-bed storage, use a visible inventory system in your closet or a digital note on your phone. A quick list or photo catalog can replace the mental load of “what’s under there?”
[pms-restrict]
A practical, step-by-step plan to empty the space
Step One: Clear and Inventory
Pull everything out from under the bed. Decide what truly needs to stay in your home and what can be donated , recycled, or trashed.
Reallocate items
Move seasonal or rarely used items to a closet, dresser, or storage ottoman—preferably with a lid to keep dust out.
For items you must access occasionally, use a high-priority, easily accessible storage solution outside the under-bed zone.
Create a Maintenance Rule and Schedule
Implement a strict “no items under the bed” rule. If something must be placed there temporarily, set a 24–48 hour move-out reminder. Build a nearby, tidy alternative
Add a storage option near or at the foot of the bed (a storage bench or a small chest) for linens, extra blankets, or reading materials. This keeps essentials reachable without tucking them under the bed.
Design for easy cleaning
Vacuum or sweep under the bed at least once a month to prevent dust buildup. If you have a platform bed with a solid frame, consider a quick wipe-down to keep the space fresh.
Integrate feng shui-friendly touches
Keep the area around the bed clear on all sides.
Ensure the bed has a solid headboard and or is anchored to a wall to enhance a sense of security and grounding.
Use soft, calming lighting and avoid electronics directly under or behind the bed to support restful energy.
Simple rules of thumb for an under-bed-free zone
Do not store anything under the bed, even temporarily.
Use closed storage (lidded bins, drawers, or cabinets) for items you need nearby but not beneath the bed.
Keep surfaces around the bed uncluttered: nightstands with only a few essentials, a small tray for daily items, and a calm color palette.
If space is truly tight, prioritize a minimal, high-utility approach: one small storage solution near the bed, not under it.
Enhancing the bedroom’s energy beyond the under-bed rule
Bed placement matters: position the bed so you can see the door while lying down, but avoid direct alignment with the door. A sturdy headboard adds a sense of security.
Lighting and color: soft, warm lighting and calming colors.