

Transforming Your Refrigerator into a Central Command Center: On-Ramping Goals & Meal Prep Inventory
Your refrigerator door isn’t just for displaying takeout menus or magnet souvenirs; it’s prime real estate for practical organization. By leveraging its highly visible surface, you can transform it into a dynamic command center for both your project goals and your kitchen inventory. This method ensures crucial information is always front-and-center, fostering accountability and reducing food waste.
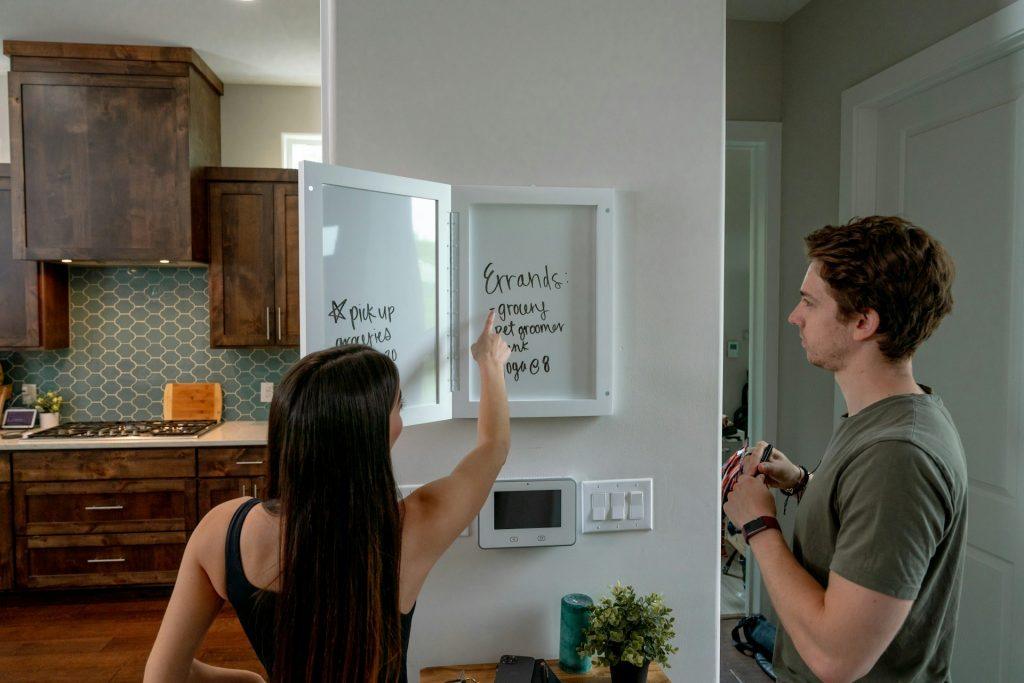
The Power of the Fridge Door as an Information Hub
Placing important lists on the refrigerator door works because:
- High Visibility: It’s a household appliance everyone interacts with multiple times a day. You can’t ignore it.
- Constant Reminder: Visual cues reinforce intentions and prevent tasks or ingredients from being forgotten.
- Shared Access: It’s easily accessible for all household members, promoting collective awareness and participation.
On-Ramping Goal List: Visualizing Progress
Whether you’re “on-ramping” a new fitness routine, a complex work project, a new household habit, or even a new family member into a routine, displaying the goals visibly can significantly boost momentum and clarity.
Why the Fridge?
For any new initiative, consistency and clarity are key. A constantly visible goal list on the fridge serves as a daily reminder of what needs to be done, the next steps, and the overall objective, preventing drift and maintaining focus.
How to Implement Using Post-its, Whiteboards & Magnets:
- Dedicated Whiteboard Section: Dedicate a small magnetic whiteboard or a section of a larger one specifically for your “On-Ramping Goals.”
- Structure: Title it clearly (e.g., “Project X On-Ramp,” “New Habit Launch,” “Family Chore Integration”).
- Milestones: List major phases or key milestones using a dry-erase marker.
- Dates: Add target dates for each milestone.
- Post-it Note Task Breakdown: For actionable steps within each milestone:
- Individual Tasks: Write each specific task on a separate Post-it note.
- Color-Coding: Use different colored Post-its for different categories of tasks (e.g., green for completed, yellow for in-progress, pink for next steps).
- Movement: As tasks are completed, move the Post-it to a “Done” section on the whiteboard or simply remove it.
- Magnetic Indicators: Use small, distinct magnets to:
- Highlight Priority: Place a star magnet next to the most urgent task.
- Indicate Owner: Assign different shaped magnets to different family members responsible for a task.
- Track Progress: Move a magnet along a linear goal path drawn on the whiteboard.
Example Content:
- Whiteboard Header: “Body Renovation Project – Phase 1”
- Whiteboard Milestones:
- Week 1: Research & Inspiration
- Week 2: Budgeting for Renovation
- Week 3: Final Action Plan
2. Meal Prepping Contents: Mastering Your Inventory
For those who meal prep, knowing exactly what’s in your fridge (and when it needs to be used) is a game-changer for reducing food waste, saving money, and streamlining cooking.
Why the Fridge?
Instead of rummaging through containers, an external inventory provides an instant overview of prepared meals, ingredients needing to be used, and their freshness status, making meal selection and future planning much easier.
How to Implement Using Post-its, Whiteboards & Magnets:
- Dedicated Whiteboard Section: Reserve a section of your fridge door whiteboard for “Fridge Contents” or “Meal Prep Inventory.”
- Columns: Draw columns for “Item,” “Quantity,” and “Use By/Prep Date.” Think about creating a spreadsheet to print for the door.
- Post-it Note Item Tracking: This is where Post-its shine for dynamic inventory management.
- Each Item, One Note: When you prep a dish or store a specific ingredient (e.g., “Grilled Chicken Breast,” “Chopped Bell Peppers,” “Lentil Soup”), write it on a Post-it.
- Date Added/Use By: Crucially, add the date it was prepped or the “use by” date.
- Location: You can even note which shelf it’s on (e.g., “Top Shelf – Left”).
- Removal: Once an item is consumed or used up, simply peel off and discard the Post-it.
- Magnetic Categories/Indicators:
- “Eat First” Magnet: Use a distinctive magnet (e.g., a bright red one) to highlight items that are nearing their “use by” date and need to be prioritized.
- Section Dividers: If your whiteboard is large, use magnetic strips to divide sections for “Cooked Meals,” “Prepped Veggies,” “Sauces,” etc.
- Quantity Markers: Small number magnets could indicate the number of servings or portions remaining.
Example Content:
- Whiteboard Header: “Fridge Inventory – Week of Oct 2”
- Post-it Notes:
- “Chicken Stir-fry (2 serv) – Ppd Oct 1” (with a “Eat First!” magnet)
- “Hard-boiled Eggs (x6) – Ppd Sept 30”
- “Chopped Carrots – Ppd Oct 1”
- “Quinoa (3 cups) – Ppd Sept 30”
- “Broccoli Florets – Fresh”
By consistently utilizing your refrigerator door with these simple yet effective tools, you create a visual management system that supports goal attainment and optimizes your kitchen workflow, turning a common appliance into an indispensable organizational asset.