Create Digital Folder for bills that arrive by email.


Health Storey Daily for Clients
Create Digital Folder for bills that arrive by email.
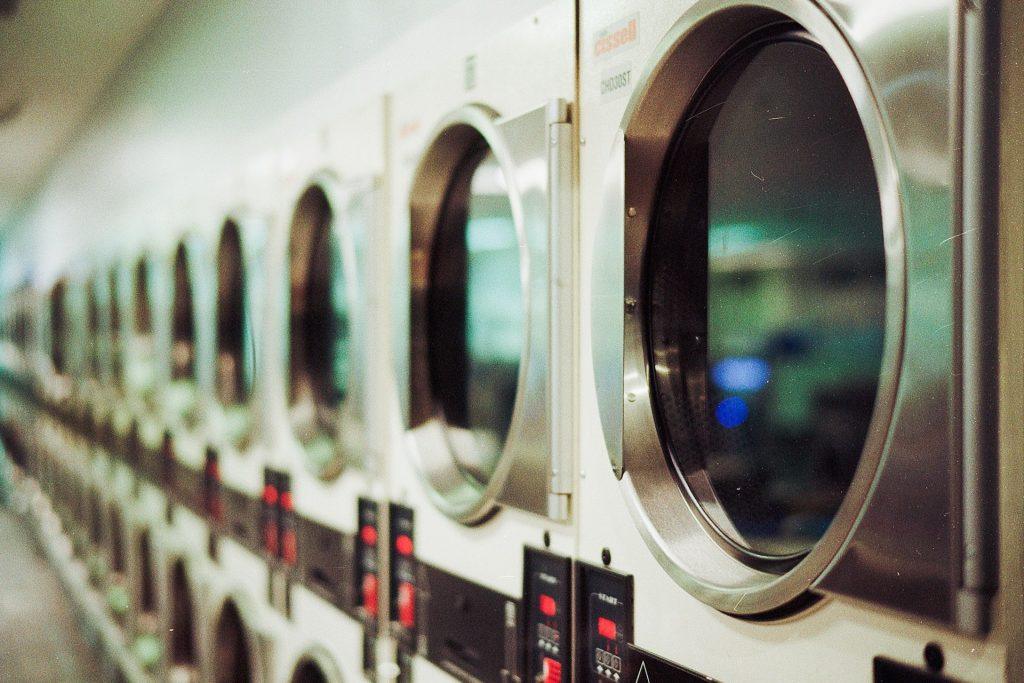
Keeping a busy home fresh and organized starts with smart washing and drying habits. In this issue, we simplify what can go in your washer, which detergents to use, and which fabrics should stay out of the dryer or need special care. Quick tip: always check garment care labels first—they’re the best guidance for each item.
– Everyday cottons and linens: shirts, jeans, towels, bed sheets. Use warm or cold water depending on soil level and colorfastness; wash darks separately from lights.
– synthetics and blends (polyester, nylon, spandex): generally fine on cold or warm cycles; many hold color well.
– Delicates and sweaters: use a gentle or delicate cycle; consider a mesh bag for small items.
– Athletic wear: wash in cold water to protect elasticity; avoid fabric softeners which can reduce moisture-wicking.
– Kids’ clothing and bibs: follow label care; use fragrance-free detergent if there are sensitivities.
– Bedding and bath towels: can often handle warm water; use a longer cycle for bulky items.
– How to sort: by color (lights, darks, bright colors), by fabric type (delicates separately), and by soil level (heavy soils separate from lightly soiled items).
– Types of detergents:
– Liquid detergents: great for greasy stains and pre-treating; easy to measure.
– Powder detergents: often cost-effective; good for hard water when paired with a water-softening booster.
– Detergent pods/pacs: convenient, but use only one per load and keep out of reach of kids.
– Fragrance-free or dye-free options: better for sensitive skin or households with allergies.
– High-efficiency (HE) washers vs standard machines:
– If you have an HE washer, use HE detergents. They produce fewer suds and work best with reduced water.
– If you have a standard washer, regular detergents work fine, but follow the label for the correct amount.
– How much to use:
– Follow the product label; a typical small-to-medium load often uses less than the cap suggests.
– For hard water, you may need a little more detergent or a water-softening booster.
– Special boosters (optional):
– Oxygen-based bleach for whites and color-safe brightening (avoid chlorine bleach on colored fabrics and delicate fibers).
– Stain pretreaters for tough spots (grease, wine, grass). Test on hidden seam first.
– Tips for sensitive households:
– Choose fragrance-free, dye-free detergents.
– Rinse cycles matter; extra rinse can help remove detergent residue that irritates skin.
– Dryer-friendly items (low to medium heat; shorter cycles help extend life):
– Most cottons and poly-cotton blends
– Synthetic fabrics (polyester, nylon blends)
– Towels and bath sheets
– Sweatshirts and fleece (watch for pilling)
– Delicates and items to air-dry or lay flat:
– Wool and cashmere sweaters (lay flat to preserve shape)
– Silk, satin, and delicate tops (use a lingerie bag or air-dry)
– Rayon/viscose and some duplex fabrics (check care label; many are air-dry only)
– Certain knitted patterns and beaded garments (premature shrinkage risk)
– What “dry-clean only” really means for home laundry:
– Dry-clean-only items should not go in a home washer or dryer unless the care label explicitly says otherwise.
– If you’re ever unsure, test with a small, inconspicuous area or take to a professional cleaner.
– Practical tips to dry efficiently:
– Clean the lint screen before every load to maximize drying efficiency.
– Use the right heat setting: low/air-dry for delicates; medium heat for most cottons; high heat only for sturdy items that tolerate it.
– Use dryer balls or clean tennis balls to help bounce and reduce drying time for bulky items like towels and blankets.
– Remove items promptly to minimize wrinkles; fold or hang after they’re dry.
– Everyday casual path: cold wash for most colors, gentle cycle for delicates, air-dry or low-heat for delicate pieces.
– Towels and bedding path: warm wash if soil is moderate, longer dry on medium heat, add dryer balls to speed up drying.
– If colors bleed: wash separate for the first few cycles or use color-catching sheets.
– Lingering odors: rewash with a bit more detergent and add a half cup of baking soda to the wash.
– Clothes shrinking after a warm wash: avoid high heat; re-wet, re-shape, and air dry if possible.
– Detergent residue on clothes: add an extra rinse cycle or run an extra rinse on the machine.
– Always check care labels before washing.
– Sort by color, fabric type, and soil level.
– Use the appropriate detergent and the recommended dose.
– Match water temperature to the fabric and soil.
– Dry items on the recommended setting; avoid high heat on delicates.


A cluttered bathroom can make mornings chaotic and showers feel less spa-like. The key is to keep only what you truly use, store the rest where it belongs, and choose colors and organizers that reflect calm and cleanliness. Below is a practical guide you can follow to reclaim your space—without turning it into a full-day project.
What to keep in the bathroom (the essentials)
These items belong in the bathroom vanity or medicine cabinet because they’re used daily or weekly and benefit from being close at hand.
Items you can relocate from the bathroom
Where to relocate items that are not essentials
Tips for keeping the bathroom from looking cluttered
Key ideas for “clean-looking” colors
Three ready-to-use palettes (with vibe and how to apply)
Palette A: Crisp & Airy
Between planning your year and juggling a million little details, a tidy, hygienic kitchen can feel like a stress-reliever, not a chore. A clean environment isn’t just about appearances—it helps reduce cross-contamination, supports safer food prep, and leaves you with one less thing to worry about on a busy day. Here’s a practical guide to keeping your kitchen surfaces clean, understanding the germs that linger, and mastering the basics of rinsing food and washing hands.
The kitchen sink is a hub of activity, not just for dishwashing but often for food preparation and general cleanup. Creating a dedicated hand washing station right next to it can significantly enhance hygiene, convenience, and efficiency in your kitchen routine. No more reaching for the bathroom or contaminating food prep areas – everything you need for clean hands is precisely where you need it.
By investing a little thought into creating a dedicated hand washing station, you’ll not only elevate the cleanliness of your kitchen but also promote healthier habits for everyone who uses it.
Please look for the Health Storey Newsletter for this week’s goals.
Your refrigerator door isn’t just for displaying takeout menus or magnet souvenirs; it’s prime real estate for practical organization. By leveraging its highly visible surface, you can transform it into a dynamic command center for both your project goals and your kitchen inventory. This method ensures crucial information is always front-and-center, fostering accountability and reducing food waste.
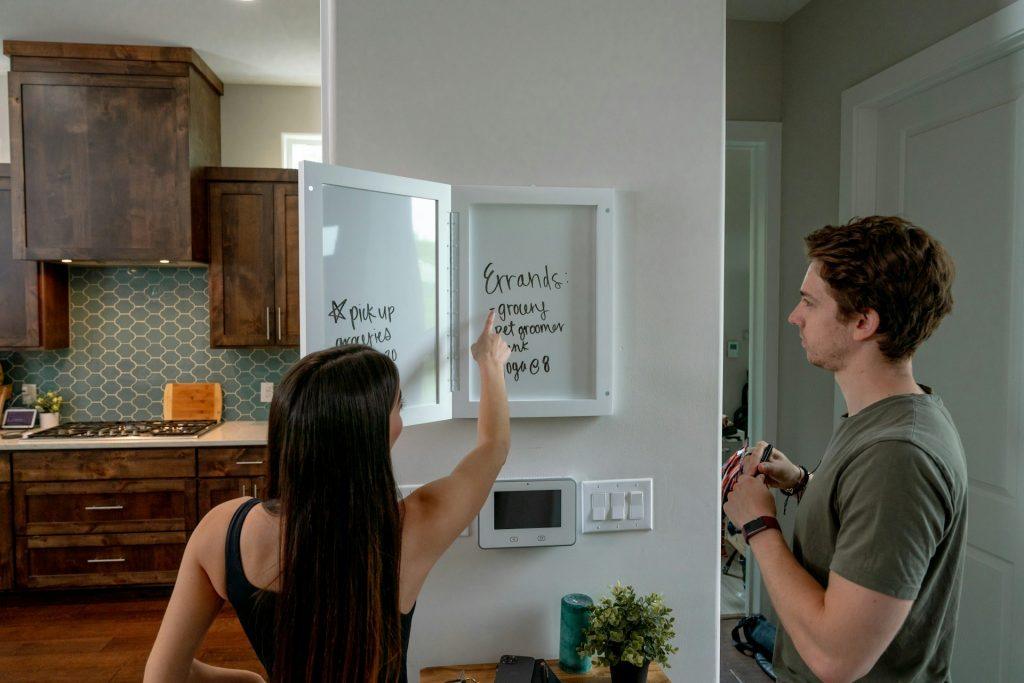
Placing important lists on the refrigerator door works because:
Whether you’re “on-ramping” a new fitness routine, a complex work project, a new household habit, or even a new family member into a routine, displaying the goals visibly can significantly boost momentum and clarity.
Why the Fridge?
For any new initiative, consistency and clarity are key. A constantly visible goal list on the fridge serves as a daily reminder of what needs to be done, the next steps, and the overall objective, preventing drift and maintaining focus.
How to Implement Using Post-its, Whiteboards & Magnets:
Example Content:
For those who meal prep, knowing exactly what’s in your fridge (and when it needs to be used) is a game-changer for reducing food waste, saving money, and streamlining cooking.
Why the Fridge?
Instead of rummaging through containers, an external inventory provides an instant overview of prepared meals, ingredients needing to be used, and their freshness status, making meal selection and future planning much easier.
How to Implement Using Post-its, Whiteboards & Magnets:
Example Content:
By consistently utilizing your refrigerator door with these simple yet effective tools, you create a visual management system that supports goal attainment and optimizes your kitchen workflow, turning a common appliance into an indispensable organizational asset.
Detox Your Kitchen: Removing Everything That Causes You to Overeat Calories
When it comes to managing weight and creating healthier eating habits, the environment you live in plays a crucial role—especially your kitchen. If your kitchen is filled with tempting snacks and calorie-dense foods, resisting overeating can become a battle. One effective way to regain control is to detox your kitchen by categorizing and removing foods based on their ability to trigger overeating.

Originally developed in the late 1970s and early 1980s by Dr. Leonard H. Epstein and his colleagues, the “Traffic Light Diet” was designed as a simple dietary tool for family-based childhood weight research. This system uses three colors—red, yellow, and green—not to describe the colors of foods themselves, but as a guide to regulate eating behaviors. For detoxing and controlling overeating, we can adapt this system to classify foods based on how they impact your tendency to overconsume.
Red foods tend to have characteristics that make them highly palatable and easy to overeat. Examples include:
Removing these foods can dramatically reduce temptations and mindless snacking, helping to break the cycle of overeating.
Yellow foods aren’t forbidden, but they demand caution:
Keep yellow foods in moderation and ensure portion control. These foods can be part of a healthy diet but should not be consumed excessively.
Green foods promote fullness and nourish your body without triggering overeating:
By focusing on green foods, you create meals that provide appetite control, body health support. By eating nutrient-dense food, Health Storey detoxers provide building blocks for the body to improve it’s health baseline.
The time it takes to inventory and label a kitchen can vary depending on the size of the kitchen, the number of food items, and how organized the space is initially. Here’s a general time estimation:
Small Kitchen (1-2 pantry/cabinet areas, fridge, freezer): 30 to 45 minutes
Medium Kitchen (3-4 pantry/cabinet areas, fridge, freezer): 45 to 75 minutes
Large Kitchen (multiple pantry/cabinet areas, large fridge & freezer): 1.5 to 2 hours
This time estimate includes:
Taking everything out for a clear view and sorting
Classifying foods into red, yellow, and green categories
Labeling items and deciding what to keep, limit, or remove
Organizing the remaining foods back into the kitchen
For a smoother process, it helps to have labeling materials ready (stickers, markers, or pre-printed labels) and to allocate some uninterrupted time to focus on the task.
Classify your Foods with labels and calorie count: Use the red, yellow, and green system based on their ability to trigger overeating.
Eliminate Red Foods: Throw away, or give away red foods you don’t need. Do not keep them in your house.
Control Yellow Foods: Limit portions and buying frequency. Make sure the calories per serving is clearly labeled for when you are making decisions on what to eat during detoxing.
Stock Up on Green Foods: Shop for fresh, whole, and nutrient-rich options knowing the calories of each food you purchase.
Create New Habits: Plan meals around the green food category to stay on track.
Detoxing your kitchen by removing overeating triggers is a powerful step toward a better and healthier lifestyle. Using the adapted traffic light system helps simplify choices and reduce decision fatigue while promoting mindful eating habits. Remember, the goal is not perfection but creating an environment that supports your well-being and helps you enjoy food without guilt or excess.
Start your kitchen detox today and take control over your cravings—your body and mind will thank you!
Disclaimer: The content on this site is for educational purposes only and is not tailored to individual subscribers. Questions or topics may not be submitted unless you are registered as a Health Storey Client. All subscribers have access to the Website FAQ . No question is answered unless the person is a registered Health Storey Client. Dr. Emmy Ann Horstkamp, JD’s research on adipose detoxification is based on self-studies and publicly available research sources. Subscription to the Trefuly websites does not confer Certified Health Story Coach status. Thank you for reading!
Bookshelves are a treasure trove of knowledge, adventure, and inspiration. But over time, they can get cluttered and disorganized, making it hard to find your favorite book. Cleaning and organizing your bookshelf doesn’t have to be daunting—it can be done in just 60 minutes! Here’s how to organize your books, choose the best place to store them and why visiting the local library can be incredibly beneficial to your budget.

Start by removing all the books from your bookshelf. Use a soft cloth to wipe down the shelves. This keeps your bookshelf looking good.
There are several effective ways to organize your books:
The ideal location for your books should have:
Public Libraries are a fantastic place to discover a wide range of books at no cost. Here’s why checking out books saves you money:
Books open a doorto new worlds, ideas, and perspectives. They expand the imagination, provide education, and promote intellectual debate. Reading enriches your knowledge base and sharpens your critical thinking skills.
The best information to focus on depends on your personal goals. Fiction can inspire creativity; non-fiction can improve skills or knowledge; self-help books can foster personal growth. Diversify your reading to gain a broad range of benefits.
Cleaning and organizing your bookshelves for 60 minutes a week can create a welcoming space that invites you to read or look up facts. Utilize your home as a place to store your books on your favourite topics and hobbies. Make the most of your local library to save money while expanding your reading horizons. Happy reading and cleaning of your bookshelves.
Start your day with a cappuccino and then a healthy breakfast that fuels your body and brain without excess calories:
Total breakfast calories: ~470
For lunch and dinner, focus on whole foods like plant proteins, lots of vegetables, and whole grains. For example:
Meal Plans totals around 900 – 1200 calories, keeping you satisfied while supporting weight management and energy balance.
| Health Storey Note | If you burn more NEAT calories, you will be happier at the end of the on-ramping with your weight management.
Disclaimer: The content on this site is for educational purposes only and is not tailored to individual subscribers. Questions or topics may not be submitted unless you are registered as a Health Storey Client. All subscribers have access to the Website FAQ . No question is answered unless the person is a registered Health Storey Client. Dr. Emmy Ann Horstkamp, JD’s research on adipose detoxification is based on self-studies and publicly available research sources. Subscription to the Trefuly websites does not confer Certified Health Story Coach status. Thank you for reading!
|Note | cleaning the living room and keeping it tidy.
|Note | Cleaning Goals to accomplish in one day | (Don’t look at this list if you get easily stressed.)
Yesterday’s Goal – Clean the front door. Finish this one goal that takes thirty minutes before starting day two. Your day two does not start until the goal from day one is done. If you don’t want to do this goal or any cleaning goals, focus on what you are eating for the day and clean the kitchen after dinner (one hour).

| Health Storey Note | In the evening, if you are sitting and watching TV, you are using 60 calories an hour. If you are standing and putting things away, you are burning 150 to 200 calories. By keeping your evening meal light and adding some NEAT calories, you will avoid adding calories that your body will label for storage.
If you lay down and watch television, your body starts storing fat reserves.
30 Day Cleaning Goal (on-ramping health goal)
Why Lounging in Front of the TV might be making you fatter.
Disclaimer: The content on this site is for educational purposes only and is not tailored to individual subscribers. Questions or topics may not be submitted unless you are registered as a Health Storey Client. All subscribers have access to the Website FAQ . No question is answered unless the person is a registered Health Storey Client. Dr. Emmy Ann Horstkamp, JD’s research on adipose detoxification is based on self-studies and publicly available research sources. Subscription to the Trefuly websites does not confer Certified Health Story Coach status. Thank you for reading!
Here’s is Health Storey’s structured 30-day daily goal plan for cleaning and clearing while on-ramping into healthy eating. Each day has a daily goal with suggested time frames for each task. You can start on any day but Health Storey suggests you start on a Monday.

30-Day Clearing Schedule with Daily Goals and Time Frames
Take a peek if you don’t get stressed out. If you get stressed out, just wait for the post each day and follow the daily prompt.
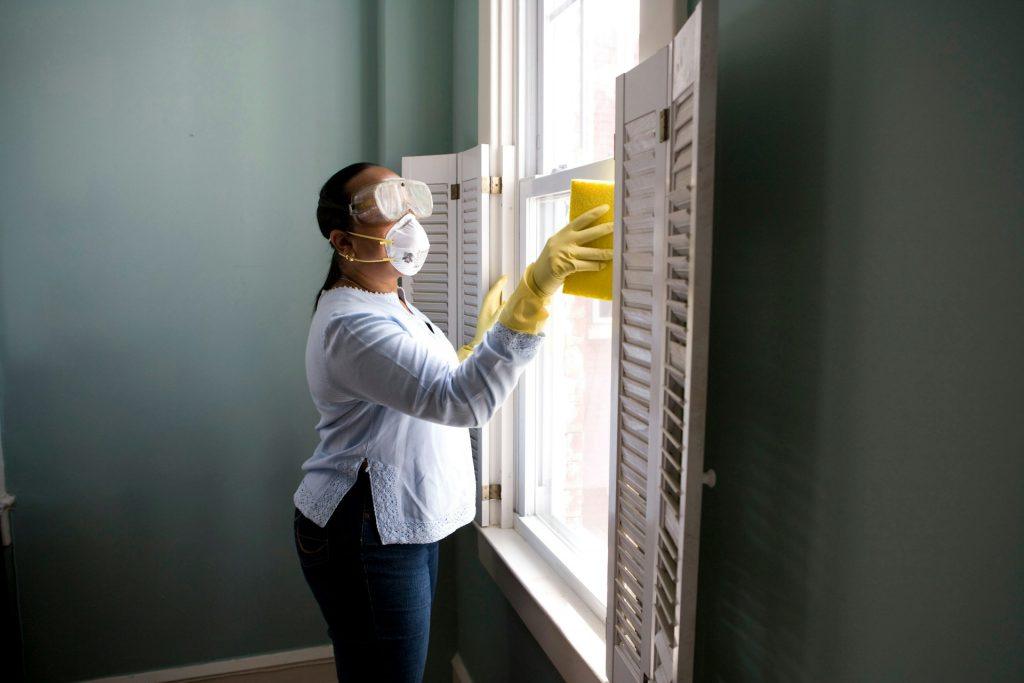
For Today, Focus on Your Front Door cleaning away cobwebs, clearing the glass , spraying down the front door and removing any debris from in front of the door. By clearing the front entrance you are burning NEAT calories which is part of living a healthy lifestyle. To accomplish this goal, the minimal equipment you will need are paper towels, windex, a broom, a dustpan and a plastic bag. Schedule 30 minutes to finish this activity.
NEAT Exercise (Non-Exercise Activity Thermogenesis):
NEAT refers to the energy expended for everything we do that is not sleeping, eating, or planned sports. NEAT activites include walking around the house, typing, gardening, cleaning, cooking, and standing. NEAT plays a significant role in daily calorie burn and overall energy expenditure, contributing to weight management and metabolic health.
As you begin your detox journey, it’s important to honor your personal readiness and preferences. Some people prefer to take the leap and start detoxing cold turkey—making an immediate and complete commitment to cleansing their body and environment from day one. This approach can provide an immediate reset and a more drastic result.
Others feel more comfortable taking their time. By gradually emptying their kitchen of their food inventory and restocking with healthy foods, the detoxer can begin a healthy lifestyle removing toxins in a less stressful way. This type of transition allows the detoxer to adjust to the pivot at a slower pace, remove old habit cues with healthier ones and build a sustainable and healthy lifestyle.
Both paths are valid and powerful. The key is to start, so let’s start! Whether you jump straight in or take steady steps forward, your health lifestyle begins now, as you build your healthy life foundation.
Sure! Here’s a concise version of the notice suitable for the bottom of each blog post:
Disclaimer: The content on this site is for educational purposes only and is not tailored to individual subscribers. Questions submitted are added to the FAQ and not answered personally. Dr. Emmy Ann Horstkamp, JD’s research on adipose detoxification is based on self-study and publicly available sources. Subscription to the websites is not the certification course and does not confer a Certified Health Story Coach status to subscribers. Thank you for reading and subscribing!
[menu_in_post_menu menu=18 style=”list”]
Welcome to Daily Storey!
At Daily Storey, Dr. Emmy Horstkamp, JD shares her approach to Health Storey and the detoxification of the Adipose. The Health Storey program believes in prioritizing your health needs, preferences, and goals, encouraging positive motivation. The Health Storey philosophy embraces Healthy Life Pivots—understanding that true well-being comes from balancing current contemporary lifestyles with goals of a healthy lifestyle.
All Health Storey detoxers begin by following an on-ramping goal for the day and a simple suggested menu:
The information for the on-ramping is dated with the date the material was added to Daily Storey. If you begin reading the on-ramping, begin on day one. If you are a subscriber you have access to the current year’s educational data for the adipose detoxification program as it is posted. The information remains available for 2026.
Disclaimer: The content on this site is for educational purposes only and is not tailored to individual subscribers. Questions or topics may not be submitted unless you are registered as a Health Storey Client. All subscribers have access to the Website FAQ . No question is answered unless the person is a registered Health Storey Client. Dr. Emmy Ann Horstkamp, JD’s research on adipose detoxification is based on self-studies and publicly available research sources. Subscription to the Trefuly websites does not confer Certified Health Story Coach status. Thank you for reading!